

This article will give you a detailed explanation on how to configure Workflow manager for SharePoint Server 2013. Unlike SharePoint 2010, we don’t get the SharePoint 2013 workflows with the SharePoint 2013 product itself. We need to install and configure “Workflow Manager” which is a standalone product that was introduced along with SharePoint 2013 to get SharePoint 2013 workflows. However, you would still get SharePoint 2010 workflows by default in SharePoint 2013. If you need to avail SharePoint 2013 workflows, then we need to install Workflow manager for SharePoint 2013 and configure a workflow farm with service bus farm.
Note: All your workflows that were built by using SharePoint Server 2010 will continue to work in SharePoint Server 2013.
The SharePoint 2013 Workflow platform uses the new Workflow Manager Service. Workflow Manager is built on top of Windows Workflow Foundation. Windows Workflow Foundation is part of the .NET Framework 4.5.
Architectural changes in SharePoint Workflow:

Installation and Configuration of Workflow Manager in SharePoint 2013:
Alright, now let’s look on how to install and configure Workflow Manager
Once configured, we need to register our SharePoint web application with the workflow farm. Once the SharePoint farm is registered with Workflow farm, SharePoint 2013 workflows will be available and we can use them in SharePoint sites.
Note: You can install Workflow manager on the SharePoint server itself or you can have separate environment for Workflow manager and attach your SharePoint 2013 farm to the Workflow manager farm
Prerequisites for Workflow manager:
If you want install workflow manager 1.0, here are the pre-requisites:
- .NET Framework 4 Platform Update 3 or .NET Framework 4.5
- Service Bus 1.0
- Workflow Client 1.0
- PowerShell 3.0
The following are the pre-requisites to configure Workflow Manager 1.0
- Instance of SQL Server 2008 R2 SP1, SQL Server Express 2008 R2 SP1, or SQL Server 2012.
- TCP/IP connections or named pipes must be configured in SQL Server.
- Windows Firewall must be enabled. [Windows Firewall is Off on target server]
- Ports 12290 and 12291 must be available.
Installation steps:
To install Workflow Manager, we need to first install Windows Platform Installer 5.0 x64 bit.
- Download Windows Platform Installer x64 bit version 5.0 from the link
- Run Windows Platform Installer
- Select the “I accept the terms in the License Agreement” and click Ok.

4. It’ll take some time to install Windows Platform Installer.

5. Once WEB PLATFORM INSTALLER is installed, go to start and search for “Web Platform Installer”, and then click on the “Web Platform Installer” icon.

6. The application will load all the required files.

9. Once done, you would get this screen as shown in the image below.

10. In this screen, go to the “Products” tab

11. Click on Add button for the below products:
- Workflow Manager 1.0
- Service Bus 1.o
- Workflow Client 1.0
- Workflow Manager 1.0 Refresh (CU2)
 11. Now, click on install.
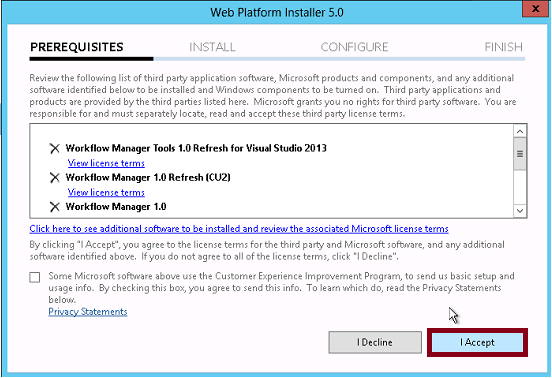
 12. Click on “I Accept”
13. You may see a prompt as shown below, don’t worry and just click Ok

14. Now, the WEB PLATFORM INSTALLER will start installation process and may take some time to install the selected products.

15. After the installation of the selected products the wizard will tell you that some of the products require some additional configuration. Click on the:” Continue” button as shown in the image below.

Alright, so now we’re done with installing the workflow manager, let’s look on how to configure it.
Configuring Workflow Manager:
- Open Workflow manager and select “Configure Workflow Manager Farm using Custom Settings” option as shown in the image below.

2. For Farm Management Database, provide the SQL instance name and the database name. Click on “Test Connection” button. It will take some time to verify and show the green tick mark symbol once the connection is verified as shown in the image below.

3. Follow the same steps for “Instance Management Database” and “Resource Management Database”.


4. Provide the service account and password which you want to use for Workflow manager configuration.
Note: Please bear in mind that you need to use a separate service account for Workflow manager configuration and not the same farm account. Else, you would get errors during the configuration.

5. Also, please note that this account should be part of the local administrators group on server(s) where you are going to configure Workflow Manager and should also have “Sysadmin” permissions on the SQL Instance
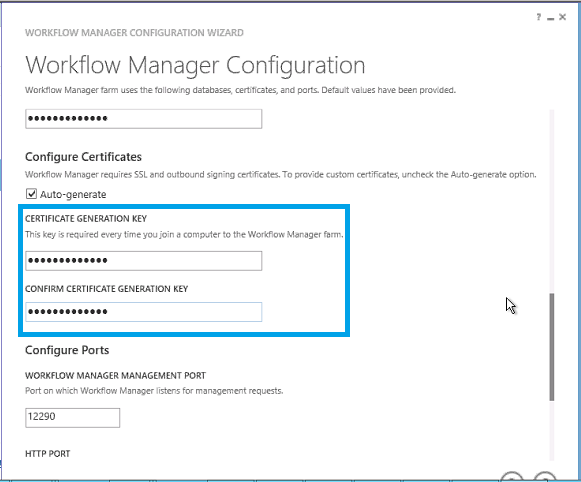
6. Next, you need to provide Certificate generation key. This is same as the “Passphrase” which we create while configuring SharePoint server farm. For adding new Workflow Host or Service Bus Host, you will need to provide the same key.
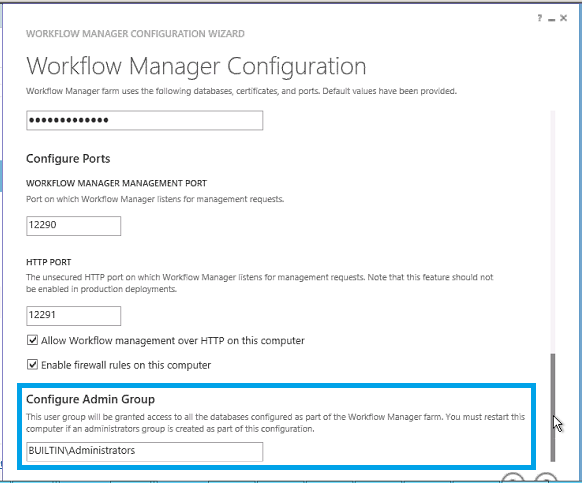
7. After setting certificate generation key, we need to configure ports for communication between workflow farm and SharePoint farm. Below are the ports we need to configure:
a) Workflow Manager Management Port for HTTPS – Default port is 12290 for HTTPS.
b) Workflow Manager Management Port for HTTP – Default port is 12291 for HTTP. If you want to use HTTP protocol for using Workflow management service, we need to select the checkbox “Allow Workflow management over HTTP on this computer”.

To open the ports, we need to create appropriate inbound rules in firewall. This wizard provides an option to create the firewall rules automatically. Select the check box to create firewall rules.
8. At this point, specify admin group for Workflow management farm. This means we need to specify the domain or local group whose members should be treated as administrators. By default, “BUILTIN\Administrators:” group is added as administrator group for the Workflow farm.
9. Click next [right arrow] at bottom of the dialog box. It will take some time to validate the configuration settings and save the same.

10. Now, it’s time to provide required details such as database info, service account and certificate generation key for Service Bus Farm.


11. If you want to use the same service account which you provided for Workflow Manager Farm in the previous window, you can select the check box “Use the same service account credentials as provided for Workflow Manager”.
12. For certificate generation, select the select the check box “Auto generate”.
13. If you want to use the same certificate generation key which you provide for Workflow Management Farm in the previous window, you can select the check box “Use the same certificate generation key as provided for Workflow Manager”.

14.Configure required ports for communication.

15. Enable firewall rules and provide Admin group.

16. After providing all the information, click on next step. Wizard will show you summary of the configuration you have provided. At this point, review the settings and if you want to change something, go back and make the required changes and then come back to summary page.

17. Now start configuring the farm.


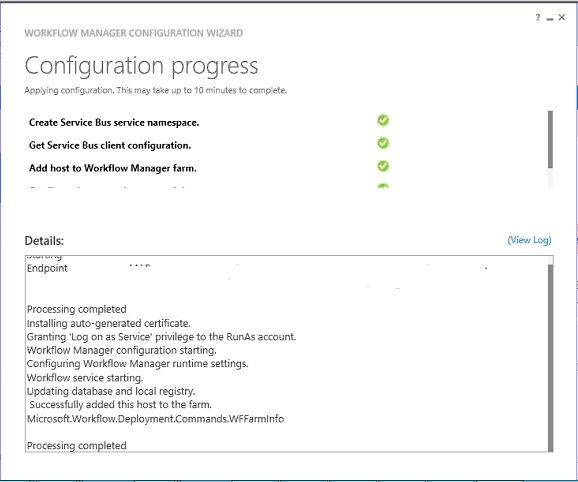
17. It will take around 10 minutes to configure the Workflow Manager and Service Bus farm.
18. Once the processing completes, close the window.

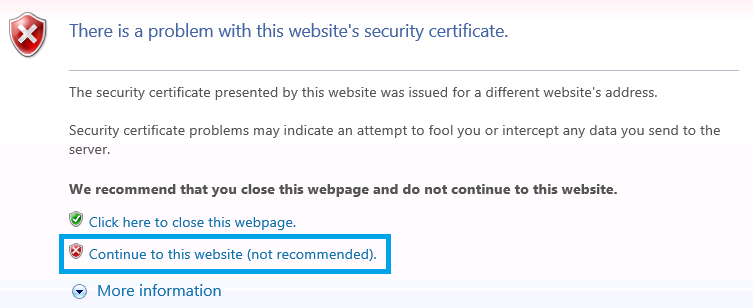
19. Now, browse the URL https://workflowhostserver.domain.com:12290 or https://localhost:12290, (if you receive certificate warning, click on continue option) this should display XML schema related to the Workflow farm.

20. Click on Certificate Icon in the address bar. Now, click on “View Certificate”.

21. Navigate to details tab and click on “Copy to file” option.

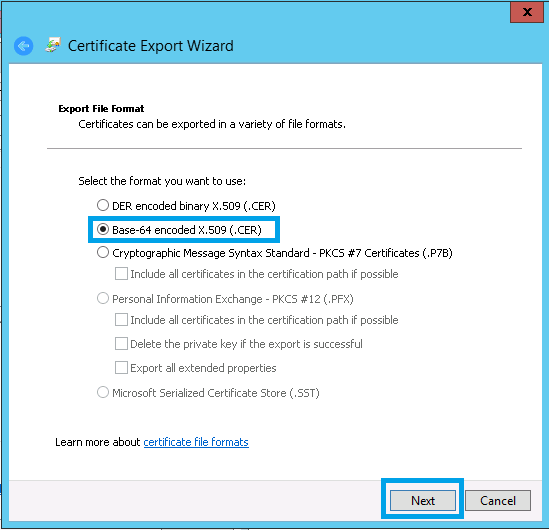
22. You will see Certificate Export Wizard. Click Next.

23. Select Base x64 type.
24. Select the directory and give a file name. Click on Save button.

25. Click on Next button.

26. Finally, click on Finish.

27. Once the certificate is exported, you will get below message. Click Ok.

28. Now copy the certificate file to the SharePoint server and paste it there. Once done, open SharePoint PowerShell using the Farm Service Account and run the below command to Add the certificate to SharePoint Trusted Root Authority.
$cert = Get-PfxCertificate <path of the certificate file with extension>
New-SPTrustedRootAuthority -Name “Workflow Farm Certificate” -Certificate $cert
- Next, register the web application to consume workflow service.
Register-SPWorkflowService -SPSite ‘https://webapp.domain.com/managedpath/sitecollection’ -WorkflowHostUri ‘http://workflowhost.domain.com:12991’ –AllowOAuthHttp
- Finally, navigate to Central Administration à Manage Service Applications à Workflow Service Application Proxy and verify that it says “Workflow is connected”.

31. To verify if the SharePoint 2013 Workflow Template is now available, open SharePoint designer 2013, open the SharePoint site, go to workflows and click on New. In drop down, it should show you “SharePoint 2013 Workflow Template”.

Common Issues and Solutions that you might encounter while configuring workflow manager:
Issue #1:
System.Management.Automation.CmdletInvocationException: The remote server returned an error: (400) Bad Request. The api-version in the query string is not supported. Either remove it from the Uri or use one of ‘2012-03’..TrackingId:0aef4968-6974-41db-bf43-fecd4fda4a38_GDS-SP2013-VM,TimeStamp:5/15/2014 1:27:51 PM —> System.ArgumentException: The remote server returned an error: (400) Bad Request. The api-version in the query string is not supported. Either remove it from the Uri or use one of ‘2012-03’..TrackingId:0aef4968-6974-41db-bf43-fecd4fda4a38_GDS-SP2013-VM,TimeStamp:5/15/2014 1:27:51 PM —> System.Net.WebException: The remote server returned an error: (400) Bad Request.
Cause: Service Bus version is not appropriately installed.
Solution:
Remove the server from SB Farm and WF Farm.
Delete the SB and WF databases from SQL instance.
Uninstall Workflow Manager and Service Bus applications.
Install appropriate versions using Windows Platform Installer. Workflow Manager Refresh 1.0 and servicebus 1.0 CU.
Issue #2:
System.Management.Automation.CmdletInvocationException: The token provider was unable to provide a security token while accessing ‘https://sharepoint0120.secam.sa.net:9355/WorkflowDefaultNamespace/$STS/Windows/’. Token provider returned message: ‘<Error><Code>400</Code>
Solution:
Make sure CU 2 for Workflow Manager is installed. The Workflow service account has dbo permission on SB and WF databases.
Issue #3:
Add-WFHost : The remote server returned an error: (401) Unauthorized. Manage claim is required for this operation.
Cause: Workflow service account is not part of ManageUsers group for WorkflowDefaultNamespace
Solution:
To find if service account is part of ManageUsers group or not, run below command
PS > Get-SBNamespace -Name WorkflowDefaultNamespace
SubscriptionId : 00000000000000000000000000000000
State : Active
Name : WorkflowDefaultNamespace
AddressingScheme : Path
CreatedTime : 17-02-2015 14:31:09
IssuerName : WorkflowDefaultNamespace
IssuerUri : WorkflowDefaultNamespace
ManageUsers : {srv_sp_test_admin@domain.com}
DnsEntry :
PrimarySymmetricKey : ******************************
SecondarySymmetricKey :
Since workflow account “srv_sp_workflow” is not listed here, we need to add it. For that, run below command.
Set-SBNamespace -Name WorkflowDefaultNamespace -ManageUsers @(‘srv_sp_workflow@domain.com’, ‘srv_sp_test_admin@domain.com’)
Now you can try to add the server using “Join the existing Workflow Farm” option. Or you may run Add-WFHost command.
Happy SharePointing!!! Thanks for reading this post.

Fantastic man
LikeLike
Hi Vignesh, Thanks for your this details. Was able to deploy Workflow Manager sucessfully.
LikeLike
Great to hear buddy.
LikeLiked by 1 person
Hi Vighnesh,
In my Single Server Workflow farm Service Bus Message Broker service is stuck on Starting, any thoughts??
Thanks
LikeLike