For many years SharePoint Migration has been a very challenging task for all the SharePoint professionals as it really requires a lot planning, assessment and careful implementation to ensure that the data remains secure and it doesn’t gets missed during the migration.
While the migration between SharePoint on-premises environment is really straight forward where you need to follow the content database detach/attach or content database copy/restore method, that was not the case while migrating the data from on-premises to Office 365 (i.e. SharePoint Online). You had to depend on many third-party tools such as AvePoint, Sharegate and Metalogix etc. to do this and these tools were indeed very costly to afford. Microsoft recently introduced the Migration API that takes advantage of Azure Blob storage which was quite convincing to use but required a lot of manual effort and even using that you couldn’t perform a migration at the site collection level. So, with all these challenges/uncertainties revolving around SharePoint on-premises to SharePoint online migration, Microsoft has announced the release of its own native Migration tool on Ignite last week. This tool is in beta version for now and is available for the public to download and explore from this link below.
Download link: _ https://hrcppestorageprod.blob.core.windows.net/migrationtool/default.htm
The best part about this tool is, it’s free and you don’t need to be a global admin or a SharePoint admin in Office 365 to use this. All you need is a write access to the destination SharePoint Online site collection and you can use this tool to migrate your data.
Alright, now let’s dive bit deeper and see how to make use of this tool and what are the features we get with this tool that can help to streamline the migration process.
How to use the Microsoft SharePoint Migration Tool?
1.To begin with, please use the link below to download and install the Microsoft SharePoint migration tool as shown in the image below.
Download link: _ https://hrcppestorageprod.blob.core.windows.net/migrationtool/default.htm
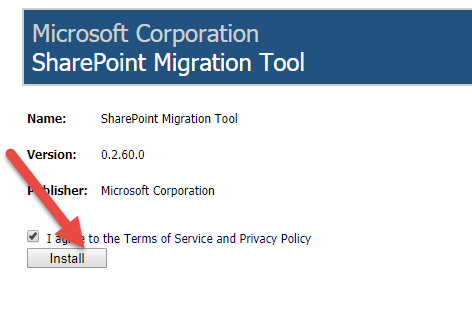
2.Once done click on “Install “on the next screen as shown in the image below.

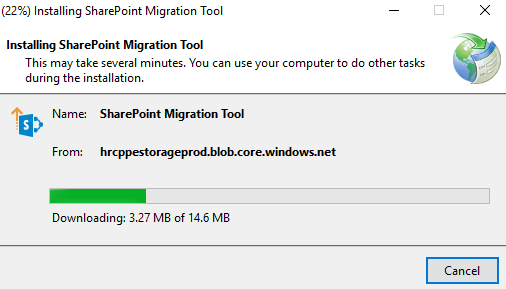
3. This should start to download and install the tool as shown in the image below.
4. After downloading and installing the tool, you would get the below screen. Please go ahead and click on next.

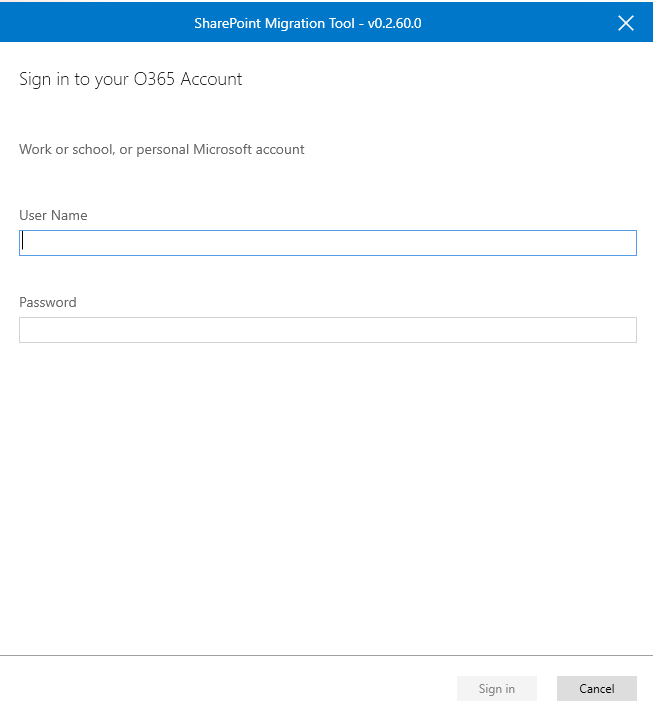
5. You would be prompted for your Office 365 credentials, please go ahead and sign-in with your Office 365 username and password.
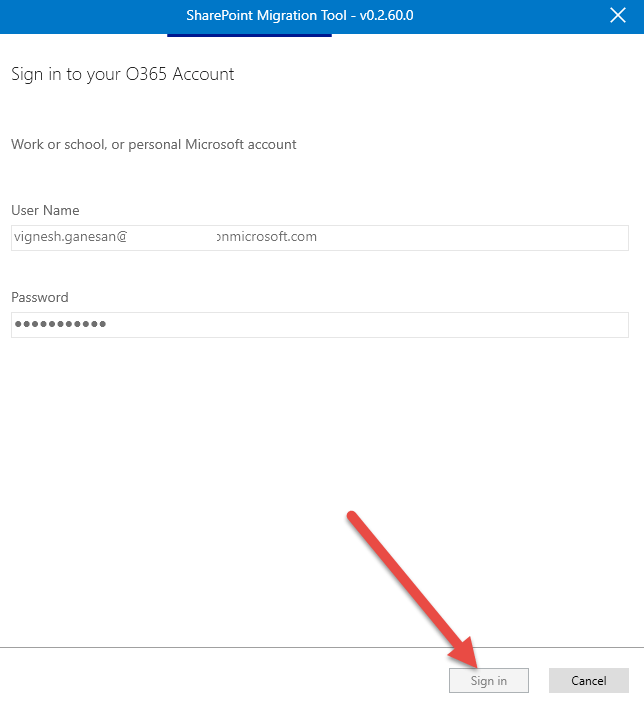
6. Once done entering your credentials, please click on sign-in as shown in the image below.
7. After you have successfully signed-in to the tool, you would be seeing three options asking where is your source data as shown in the image below.

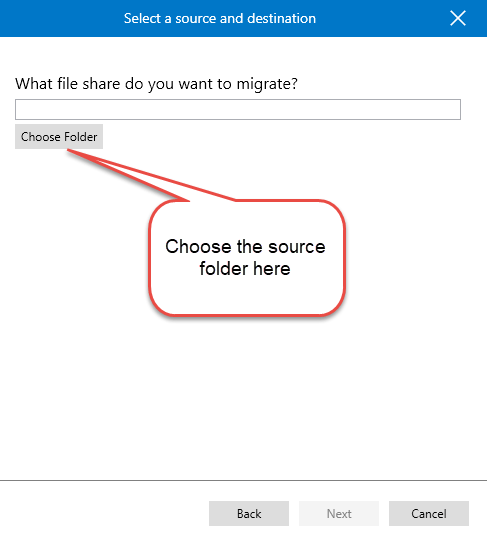
8. In this example, I wanted to migrate the data from a “File Share” to a “SharePoint Online site” and hence I’m choosing File Share as the source as shown in the image below and it asks me to choose the folder.
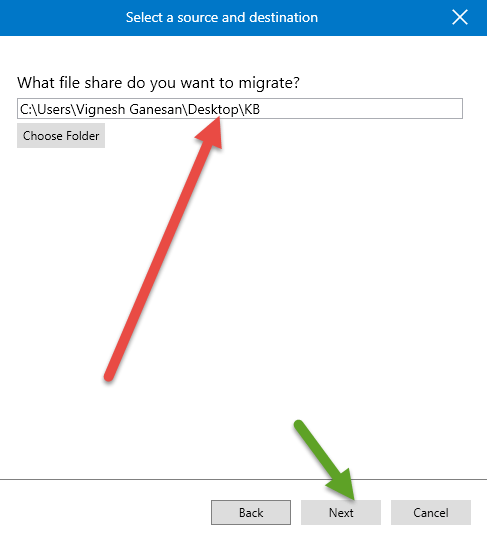
9. Once done choosing the file share path, please go ahead and click on next as shown in the image below.
10. So, once you’re done choosing the source path you would be prompted to choose the destination SharePoint site as shown in the image below. Please specify the site URL and also the document library to where you need to move your content.
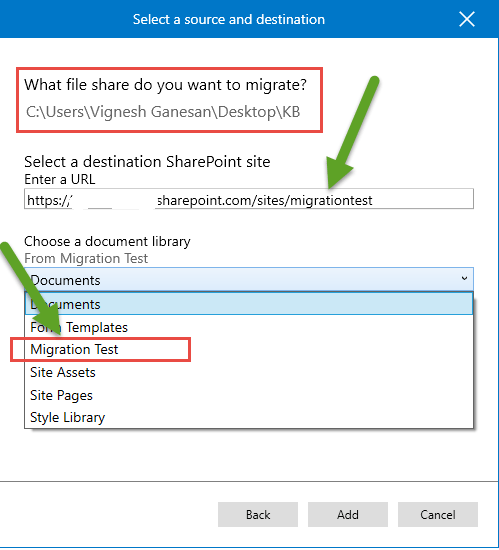
Note: Please make sure that you have site collection admin access to the target site because only then it would retrieve the document libraries in the drop-down
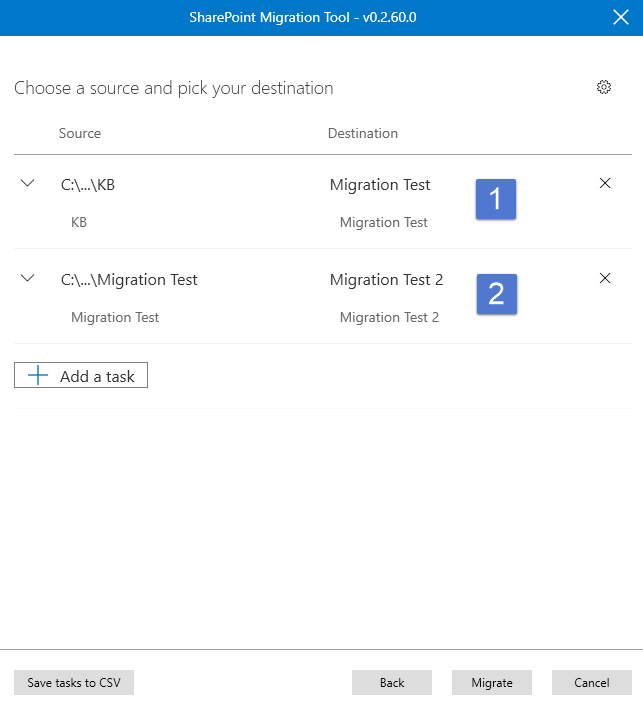
11. Once done adding both the source and destination, please go ahead and click on add and the tool will add this to the list of tasks as shown in the image below.

12. So as shown in the image below, you can see the list of tasks added for migration and if required you can add few more tasks as well.
Note: The tasks that you add here can be of different types (meaning, you can add a task for migrating contents from a file share to a SharePoint Online site and the second one can be to migrate data from a SharePoint on-premises site to a SharePoint Online site and the third one can be a bulk migration task using a CSV file)
- You can also use the pause button if required to pause the migration process as shown in the image below.
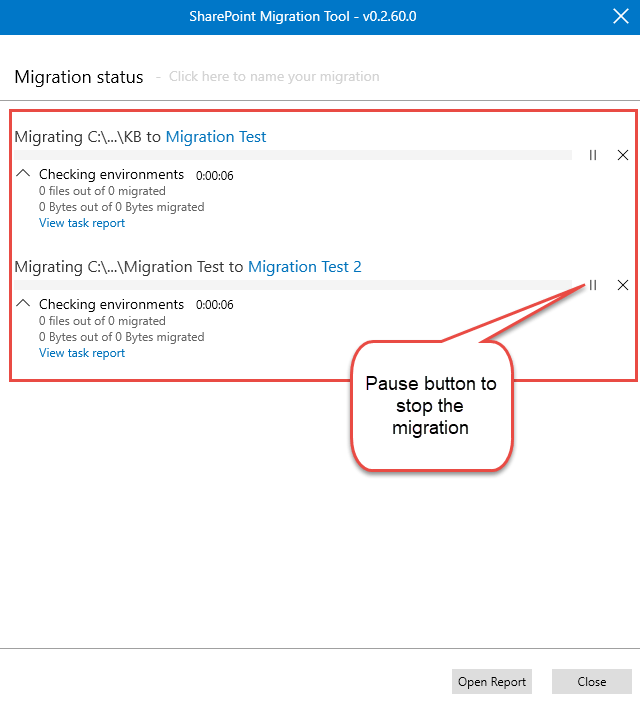
14. Once you click on the “Migrate” button you can notice that the migration process has started as shown in the image below.
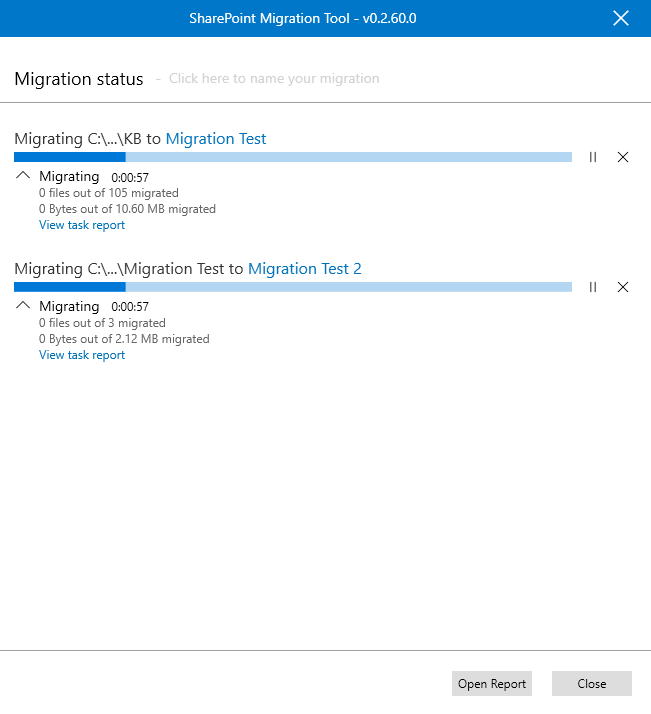
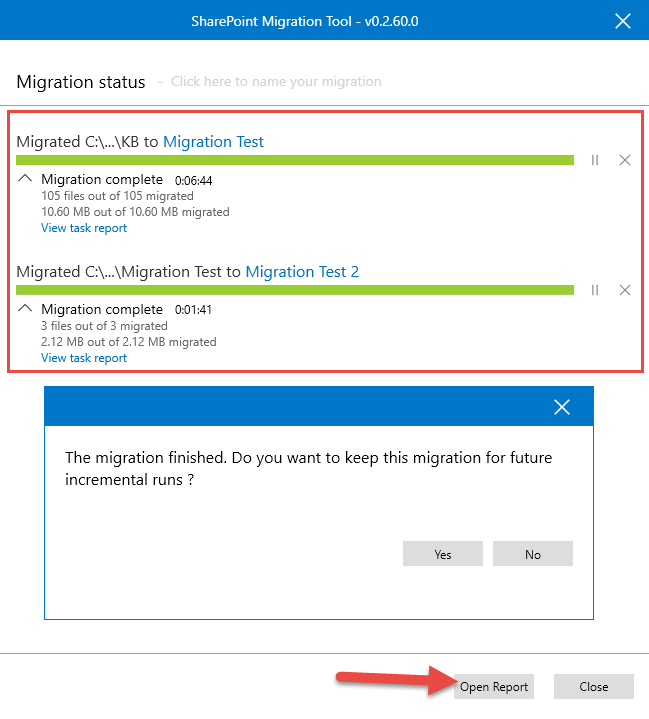
15. Finally, once the migration is completed you can check the completion status as shown in the image below. In addition to that you can also click on the “Open report” button to get the migration reports.
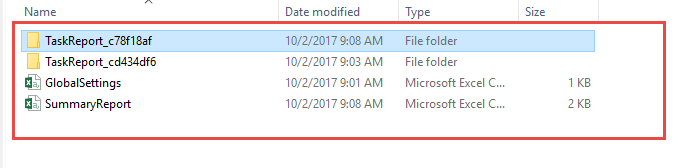
16. Once you click on the “Open report” button the windows explorer will open the below mentioned folder structure from where you can access the migration reports.
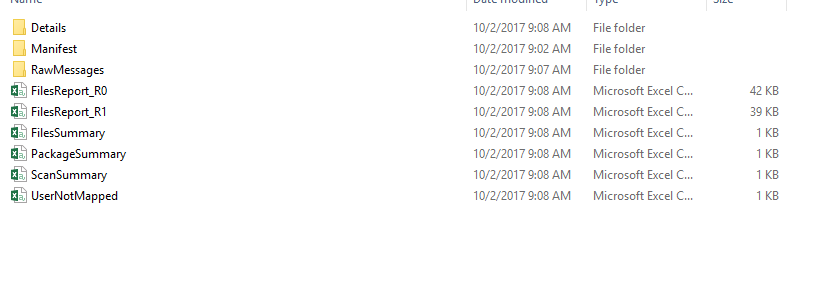
17. This is how the contents in the report would look like.


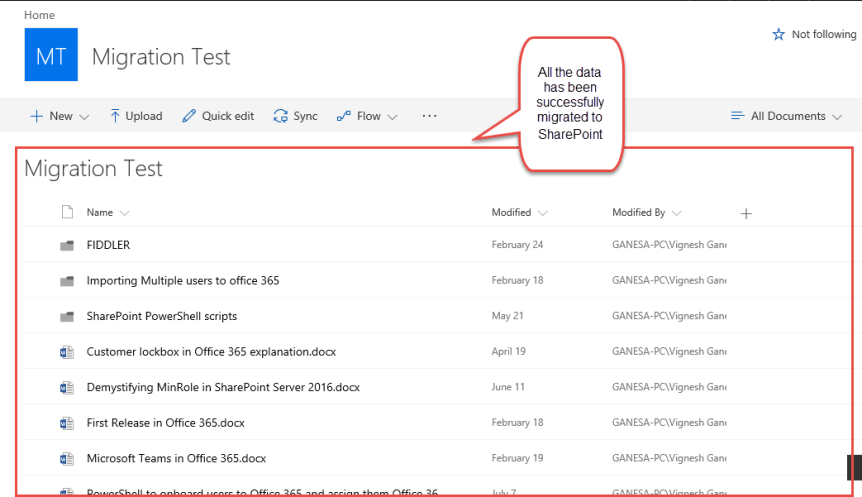
- Finally, you can check the document library in the destination SharePoint Online site to confirm whether the files have been migrated successfully .In my case please see the image below which confirms that the files have been migrated successfully.
19. So in the above example I showed you how to perform a migration using this tool from a file share to a SharePoint online site. Similarly, you can do the same for migrating the files from a SharePoint on-premises site to a SharePoint online site. However, before doing so please check and ensure that you have site collection access on both the source and destination. Finally, you can plan bulk migration tasks using the CSV file option. I’ll discuss in detail about that in a different article very soon .
What happens behind the scenes while using the Microsoft SharePoint Migration Tool?
Well, just in case if you’re interested to know what happens behind the screen while using the tool the steps below should give you an overview about that.
On a high level this is what happens,
- You enter your Office 365 credentials to authenticate yourself.
- Then you get prompted to enter the source (i.e. File Share or SharePoint on-premises site URL or the CSV file for bulk migration) and the destination SharePoint Online site where you want to migrate the files.
- Once you’re done specifying the details and click on the migrate button , the tools takes care of scanning , packaging , uploading and importing the files and all these tasks are performed in parallel across all the files submitted for migration .
Let’s dig bit further and see what happens at each stage …
On the Authentication stage:
After opening the tool, the first thing we must do is authenticate to the destination SPO site (i.e. the tenant where you will be migrating your files) by providing your username and password .By doing so the tool associates the migration jobs with your account. This allows you to resume your migration from another computer if needed by logging in with the same credentials. This account should be a site collection administrator of the destination where you want to migrate the files.
On the Scanning stage:
Once you click on the “Migrate” button, a scan is performed on every file. Please note that a scan is always performed; even if you elect to not migrate your files (see Advanced Settings). The scan verifies that there is access to the data source and write access to the SharePoint Online destination. It also scans the file for known potential issues and risks.
On the packaging stage:
On the packaging stage, a content package is created that contains a manifest consisting of 8 XMLs.
On the uploading stage:
On the uploading stage, the content package is uploaded to Azure with the manifest. Before a migration job can be accepted from a SPO provided Azure container, the data is encrypted at rest using the AES CBC 256 standard. The files are encrypted along with the manifest files.
On the importing stage:
On the importing stage, the key is provided to SPO SAS. Only Azure and SPO are interacting to fetch and migrate the content into the destination. This process is a timer job based, but does not prevent other jobs from being queued up. During the import, a report is created in the working folder and live updates are made. After the migration job is completed, the log is stored in the Azure container and a final report is created. A log is stored in each Manifest Container.
Recommendations for using the Microsoft SharePoint Migration Tool:
For best performance:
| CPU |
64-bit Quad core processor or better |
| RAM |
16 GB |
| Local Storage |
SSD : 150 GB free space |
| Network card |
1 Gps |
| Operating System |
Windows Server 2012 R2 or Windows 10 client
.NET Framework 4.6.2 |
For slow performance:
| CPU |
64-bit 1.4 GHz 2-core processor or better |
| RAM |
8 GB |
| Local Storage |
Hard disk: 150 GB free space |
| Network card |
High speed internet connection |
| Operating System |
Windows Server 2008 R2, Windows 7 updated or better
.NET Framework 4.6.2 |
Impact on the file permissions when it’s migrated:
The user permission would be retained to the cloud provided that the user accounts are synced to Azure AD using AAD Connect tool and the users have SharePoint Online licenses assigned to them.
The below mentioned table should give you an overview about how the user permissions are mapped when a user is synced to Azure AD and when he/she is not synced:
| User sync status |
File Share |
SharePoint on-prem files |
| User mapped between on-premises and SPO (using AAD Connect tool or a user mapping file provided) |
There are only two types of permissions that will be migrated; Read and Write.
If a file has Write permission for user1, then the file will be set to Contribute for user1 in SPO. If a file has Read permission for user1, then the file will be set to Read for user1 in SPO.
Note: At this time, the special permissions, such as Deny, will not be saved. |
All the unique permissions on a file will be migrated to SPO. Inherited permissions will not be migrated. |
| No user mapping (not-synced, no user mapping file) |
Files will be assigned the default permission of the location to which it has been migrated in SPO. |
Files will be assigned the default permission of the location to which it has been migrated in SPO. |
Behavior of the tool when you choose SharePoint on-premises and File Share:
SharePoint on-premises: If you select the SharePoint on-premises option, you will be asked to enter the name of the SharePoint Server site where your files are located and prompted for your credentials for that site. You will indicate what document library you wish to migrate.
Note: As of now the tool only supports SharePoint 2013
File Share: If you select the File share option, you will be asked to enter the location of the file share, the URL of the SharePoint Online site and document library where they will be moved.
Advanced settings in the Microsoft SharePoint Migration Tool:
Use the advanced settings option in the tool you can perform the below mentioned tasks as well.
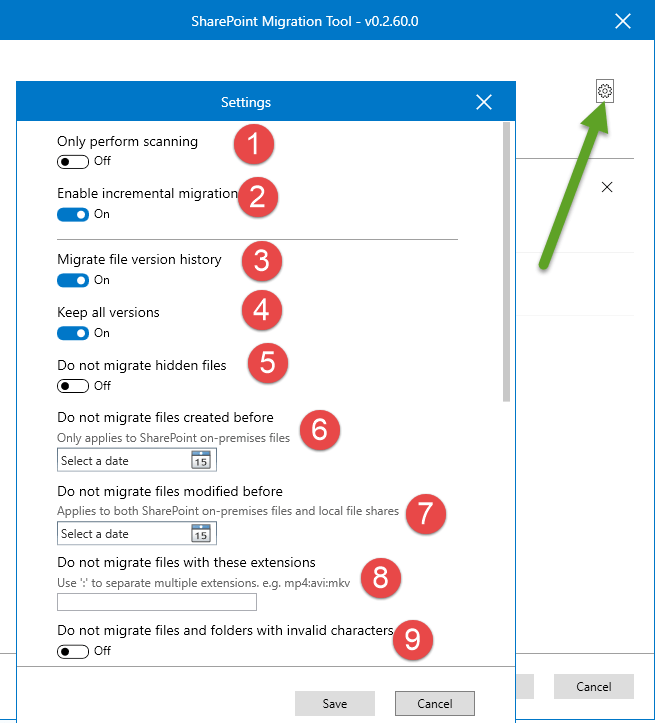
In order to make use of the “Advanced settings” option on the SharePoint Migration Tool, please make use of the gear icon on the window where you see the “Migrate” button after specifying the source and destination as shown in the image below.
| Setting |
Description |
| Only perform scanning |
If you wish to scan the files as a pre-assessment to migration, turn Only perform scanning on. |
| Enable incremental migration |
By setting enable incremental migration to On, it lets you rerun the migration jobs at a later date, migrating only the changes or additions since the previous run.
Important: If you wish to be able to submit this job again for incremental migration, this setting must be set to On before the initial migration job is submitted. |
| Migrate file version history |
If set to No, only the most recent version of the file will be migrated. If set to Yes, you can choose whether to keep all versions, or limit it to a specific number. |
| Do not migrate hidden files |
If set to On, hidden system files will not be migrated. |
| Do not migrate files created before |
If you choose to limit what files are migration based on creation date, set your values in this section. This may be to limit the number of files migrated or to adhere to overall company governance policy regarding file retention. |
| Do not migrate files modified before |
If you choose to limit what files are migration based on modified date, set your values in this section. This may be to limit the number of files migrated or to adhere to overall company governance policy regarding file retention. |
| Do not migrate files with these extensions |
To prevent certain file types from migrating, list each extension, separating it with a vertical bar. For example, mp4|avi|mkv. Do not include the leading “.” before the extension name |
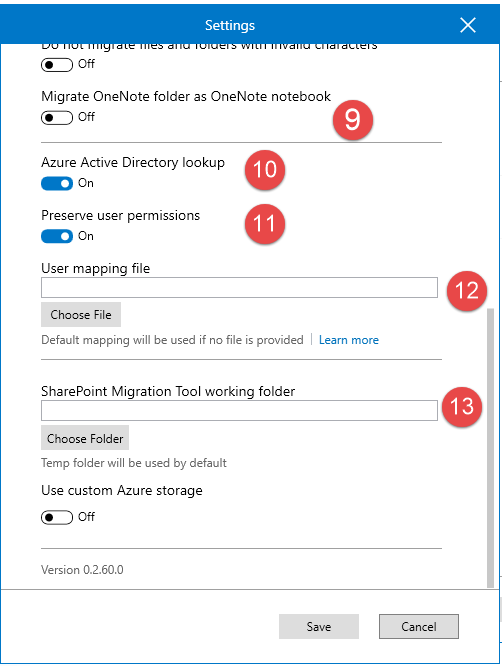
| Do not migrate files and folders with invalid characters |
By default, the setting is set to Off. This is the recommended setting. The tool will attempt to move all the files without filtering on characters. If any file can’t be accepted into SPO, a failure message will be generated for that file.
If set to On, the tool will skip any potential special characters. While this can improve performance when the source potentially contains a high number of files containing invalid characters, it also has drawbacks. To prevent malicious activities, source packages that generate more than 100 errors to the destination server will be blocked. As a result, all valid files in that package would also be blocked. |
| Active Azure Directory lookup |
By default, this is set to On. If no User mapping file is provided by the user, then Active Azure Directory is used as the default for user mapping. |
| Preserve user permissions |
By default, this is set to On. If set to Off, no permissions will be preserved. |
| User mapping file |
By default, Azure AD lookup is used to map users when submitting migration jobs. If you wish to use your own mapping file, select the file to be used by clicking Choose file. If you choose to use a custom user mapping file and you want to preserve user permissions, turn off Active Azure Directory lookup. By doing so if a user isn’t found in the mapping file, the tool won’t look in up in AAD. |
| SharePoint Migration Tool work folder |
By default, a temp folder will be created. If you wish to specify a specific working folder, enter the name here. |
| Use custom Azure storage |
If you wish to use your own Azure storage, set this value to On.
If you choose to turn on, additional fields will display to enter your account and key, and settings to select if you want to enable or disable encryption, and whether temporary files are deleted when migration is complete. |
Conclusion:
The Microsoft SharePoint Migration tool in indeed a powerful and free to use tool. As of now the product is in beta version and Microsoft is continuously working on enhancing the tool by adding many cool features which you normally get to see on any third party migration tool such as Sharegate , Metalogix or AvePoint . You can even plan a migration of terabytes of data by using this tool so that your users can start taking advantage of the cool features in cloud. Last but not least, given the features and simplicity of this tool, this is definitely a must have tool for every SharePoint Admin out there.
You can also read this article on the Hubfly blog site too by going through the link below and very soon I’ll be making a demo video on the Microsoft SharePoint migration tool which would be avaialble on the Hubfly blogsite .
Please subscribe to the Hubfly blogsite for many cool articles on SharePoint & Office 365 .
Here’s the link : http://www.hubfly.com/blog/migration/microsoft-sharepoint-migration-tool-step-by-step-walkthrough/
Good luck with the Microsoft SharePoint Migration Tool….Happy SharePointing!!!