SharePoint 2016 RTM to go live soon… Maybe March 14

Dreams do come true: The final version of SharePoint 2016 could be here in less than five weeks.

Earlier today, Gregory Appel, in response to a question posed by a participant in his seminar on Excel Services and BI in SharePoint 2016, said SharePoint 2016 RTM (Release-To-Manufacturing) should be available by March 14.

He also said Office Online Server would be pushed to RTM at the same time.

RTM versions of software are versions that are released to hardware manufacturers, typically before general release to work out any remaining bugs.

Appel is a senior program manager in Excel and based in the Microsoft Israel Development Center. He was addressing participants in an Unity Connect session. In response to a question, Appel replied:

2016_10_02 SharePoint RTM Tweet

His statement was tweeted from the seminar by session participant Rainer Jeschor.

While Microsoft has yet to confirm the date for the RTM or the full general release that will follow, March 14 is in keeping with the spring timetable that Microsoft confirmed when it unveiled the Release Candidate in January.

The RC is as close as you can get to a full release. And it is “mostly feature complete,” Bill Baer, senior product manager for the SharePoint team, noted in a blog post at the time.

Appel did not go into any more details as to what might have changed since then, but it’s unlikely that it will be much different than the RC.


SharePoint 2016 : Zero down time patching

I honestly couldn’t refrain myself from sharing the below mentioned two blogs where the author has did a wonderful job in explaining Zero down time patching in SharePoint 2016.Please take look ….


http://sharepointpromag.com/sharepoint/sharepoint-2016-what-you-need-know-about-zero-downtime-patching

http://sharepointpromag.com/sharepoint/sharepoint-2016-what-patch


Issues with MDS feature in SharePoint 2013:

This post is related to the previous post I made in my blog describing the “Issues involved with Minimal Download Strategy feature”. I’m not going to really get into the meats and potatoes of that issue here once again .However , if you want to create a KB article for your end users letting them know that this is a known issue in SharePoint 2013 , then this would be the article for that ….

The Minimal Download Strategy  (MDS) feature in SharePoint 2013 can introduce the below mentioned two issues when you enable it in a team site. It’s a known fact that MDS will be turned on by default in a team site in SharePoint 2013.

Issue 1Deleting a document from a document library will produce an error as shown in the screenshot below.

MDS 1

Explanation:

When you go to a document library in a team site which has the MDS feature turned on and try to delete a document, it’s going to produce an error as shown in the screenshot above.

Repro steps:

Go to a document library in a team site which has the MDS feature activated (remember this feature will be activated by default in a SharePoint Team site) and try to delete a document from a document library by clicking on the “ellipsis” –>“Delete document “BUTTON, you will see an error as shown below without any correlation ID. However, the document would still get deleted from the document library.

Now, this error is not because of any bad configuration in your SharePoint Farm or due to any feature dependency for the MDS feature to work seamlessly .This seems to be a problem with the product itself and looks like this hasn’t been fixed yet.

Workaround:

  1. This error doesn’t show up when you try to delete the document using the “delete document”button in the top ribbon interface.

MDS 2

  1. Also if you try to by-pass your load balancer by changing the host file of your PC to point a specific WFE, this error won’t show up.

Issue 2: Trying to create a new view in a document library will produce an error as shown in the screenshot below

MDS 3

URL will show this error code:  _vti_bin/owssvr.dll?CS=65001

Explanation:

When you go to a document library in a team site which has the MDS feature turned on and try to create a new view, it’s going to produce an error as shown in the screenshot above and the site url will also display this error code : vti_bin/owssvr.dll?CS=65001

Repro steps:

Go to a document library in a team site which has the MDS feature activated (remember this feature will be activated by default in a SharePoint Team site) and try to create a new view by clicking on the “ellipsis” –>“Create a new view “BUTTON, you will see an error as shown below without any correlation ID. However, the new view will still get created.

Workaround:

There is no workaround identified for this as of now, as the error pops up even if you use the “Create view “option in the top ribbon interface. However as already mentioned above the view would still get created.

Note: This error wouldn’t show up if you try to by-pass your load balancer by changing the host file of your PC to point a specific WFE

Conclusion:

We have did our troubleshooting on this issue by working with Microsoft and this seems to be a bug in the product. The F5 load balancer which takes care of handling user requests to the portal seems to be causing the trouble here.

Signing up for Office 365 trial plan:

This is going to be a simple article where I’ll be explaining  how to sign up for a free Office 365 trial plan and make use of its services. As you must be aware, Office 365 gives you a one month free trial version where you can sign in for Office 365 and play around with the services and gain some knowledge on what Office 365 is all about, what are the services it offers and  how to manage users/services etc.…

I’m going to make this post pretty  basic by just discussing the steps involved in signing up for an Office 365 trial version and utilizing the services offered by it. So if you’re someone who is new to Office 365 and would like to understand how to get started with using Office 365 services, then this article would be a good primer article for you guys …..

Alright let’s jump in …

  1. Please go to https://products.office.com as shown in the screenshot below.

1

2. Choose “For business” option, it will take you to a screen as show below. You can also choose “For home” if you would like to explore the features in that plan. I’m going with the business option here as it gives you more features when compared with the home plan.

2

3. Once you’re done clicking “For business” option, it’s going to take you to a screen as shown below. You can notice all the available Office 365 business plans here …If you scroll down it would give you a detailed explanation about what’s included in each plan and the licensing cost. So carefully take a look at the plans before choosing it.

3

4. I’m choosing the “Office 365 Enterprise E5 “free trial plan as you can see in the screenshot below. You need to click on the “Free trial “button if you want to subscribe for a trail version. Also please notice that the free trail plan is valid only for one month.

4.PNG

5. You would be taken to a form as shown in the screenshot below asking for your details. Please fill in the appropriate information and click next. Also please bear in mind that you won’t be able to change your country after you have successfully signed up for Office 365.

5

6. The next screen would be asking your username, password & Company name .Please key in those values and click next

Note: The Company name which you key in here will become a part of your Office 365 tenant url , SharePoint Online sites url , Skype for Business meeting url &  Email addresses of those users who are synced with Office 365.  Also while entering the Company name, please make sure that you’re entering an imaginary name or the name of a domain that you own and not a real company name .It’s strictly not recommended to enter your company name without consulting your IT team .

7

7. Once you’re done entering the values, click next and it’s going to ask you to enter your mobile number just to make sure that you’re not a robot. So enter your mobile number and then key in the verification code which is sent to you as a text.

8

9

8. Once you’re done entering all these details you’re all set now and you will see the below mentioned screen which says that its saving all your details …

109. Please remain patient for few mins until your Office 365 tenant is completely set up, you will get a screen like this as shown in the screenshot below.

11

10 .However , please note that by this time your Office 365 tenant is not yet completely set up .The app launcher is still configuring things for you …so please remain patient for few more minutes . You can click the app launcher and check the status….

You can see the note which says, “Setting up “.

12

11. So finally after few minutes, you can notice the apps getting displayed in the app launcher indicating that your Office 365 tenant is set up successfully.

13

12. You can also take a look at the “service overview” page to check the health status of all the services.

14

13. Please click on the “Admin” option towards your left hand side to access all the services.

admin page

14. This is how the admin center for each service looks like ….

For Exchange

Exchnage admin centre

For SharePoint

SharePoint Admin centre


For Skype for Business

Sfb admin centre

15. You can use the “USERS” option towards your left hand side to manage users and their licenses in the Office 365 admin center.

Managing users.PNG

16. To make any changes to a user’s account such as resetting his/her password , edit the user’s details and to assign licenses etc. …please select the user first and then it will give you an option towards your right hand side to do that …(please see below )

User info.png

17. Azure Active Directory is only available for paid customers, so if you’re trying to access it on a trial version you’re likely gonna end up with the error as shown in the screenshot below.

Azure for AD

18. I’ve also created few more articles in my blog about Office 365 Identity management, Office 365 Troubleshooting tools, Useful Office 365 PowerShell commands & Required ports for Office 365 implementation…Please go through the below mentioned links to read them.

Office 365 Identity management

Office 365 Troubleshooting Tools

Useful Office 365 commands

Required ports for Office 365

Thanks for reading this post!!!


February 9, 2016, cumulative update for SharePoint Server 2013 is out -(KB3114726

Feb CU seems to have security fixes that take care of the Word and Excel functionality and these fixes are pushed via the Windows Update.

Please find the links for the CU’s below :

SharePoint 2013 Feb CUhttps://support.microsoft.com/en-us/kb/3114726

OWA security update :  https://support.microsoft.com/en-us/kb/3114338

SharePoint CU fix notes : 

  1. If you start a crawl of a content source, the mssearch.exe process causes high CPU usage.
  2. If the claim map cache fills up in SharePoint Server 2013, a race condition occurs that causes a poor user experience.
  3. After you delete a SharePoint group from a site, the SQL database may be locked. When the SQL database is locked, farm availability issues occur
  4. After you install security update 3114503 (MS16-004), you can’t view items in custom lists. (When you install the security fix ONLY)
  5. When you try to follow a site or a document in a multi-farm environment
  6. Incorrect ranked results are returned

SharePoint 2010:

Security fix for Word and Excel has been released for SharePoint 2010

Feb 9, CU for SharePoint 2010 : https://support.microsoft.com/en-us/kb/3114558

OWA Security Update :  https://support.microsoft.com/en-us/kb/3114407

SharePoint 2007 :

Security update for SharePoint 2007 :_  https://support.microsoft.com/en-us/kb/3114432


SharePoint 2013 Bug: Access denied error while activating “Following Content” feature

Alright…This post is regarding a bug with the “SharePoint site follow feature “that we recently happened to encounter in our environment. This specific bug which I’m going to discuss about in this article later has already been acknowledged by Microsoft as a bug which was later fixed in Office 365 ( SharePoint Online ) . I’m not sure if this is known issue but if this is something new to you , please try to go through this article to have a clear understanding about this issue .

So before we could start discussing about this bug ,how about a small introduction on the “ follow” feature and what it does and how to activate it …

Activating this feature:

  1. Go to site settings à Manage site features à Activate following content feature.1
  2. Doing this will turn on the follow feature on the site and will display the “follow” button on the top right corner of your site.

What happens when I follow a site and what’s the permission level needed to follow a site?

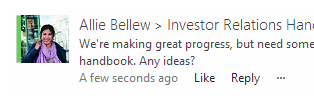
You at least need “Read “permissions on the site you’re trying to follow. Following a site will bring the conversations being discussed on the Site’s feed to your “My site” News feed section.  Make sure you have the “Site Feed “feature turned on to add the “Site Feed” web part to the main site .This is where the conversations take place.

2

What else can be followed?

The below mentioned four things can be followed in SharePoint.

  1. Site –>This will bring the conversations happening on the site’s feed which you’re following to your “My site” Newsfeed section.

3

2.People–>Following a person will start showing the things they do, they say, and the things that happen to them (for example, job title changes).

4

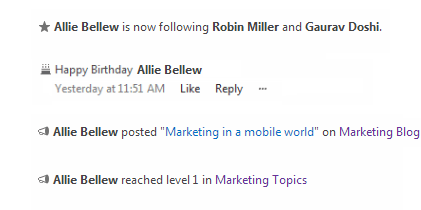
3. Documents–> Following a document will display any changes made to that document in your Newsfeed .This way you can have a track of all the changes made to a document your currently working on and following .

5

4. #Tags–>Following a #Tag will bring all the conversations that include that #Tag to your Newsfeed even though you don’t have any idea about the person who is using that #Tag in a conversation .Also please note that a #Tag should always be in a single word only .It can’t be in two words.6

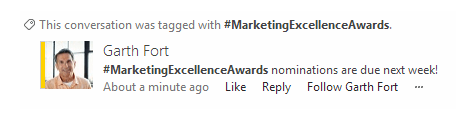
In addition to this you have a special section called “Trending Tags” in your “My site” which displays the heavily used Top 5 #tags in your farm. This web part works based on search content crawling. I have written an article about this on my blog site already, please go through that article by clicking here.

Now, since we discussed about the “follow” feature and its uses, let’s jump into the Bug that I pointed about before in this article…

Bug in the site “follow” feature:

When you try to go to the site settings and activate the “Following content” feature you would end up getting an “Access denied error”. Now this is not the case all the time, but during some special scenarios where only the person who created the site would be able to activate this feature.

7

8I confirmed that I’m the site collection admin in the site where I’m trying to activate this feature and still it won’t allow me to do it. I tried removing myself from the SCA group, removed my account from ‘People & Groups” section and added myself back again and still it didn’t allow me to activate this feature. I tried couple of times and also asked the other SCA’s of the site to activate this feature and still it gave the same error …Weird isn’t it?

So after spending quite some time in trying to activate this feature we started to dig into the uls logs by turning on verbose logging and this is what we found….

SPRequest.GetFileAndFolderProperties: UserPrincipalName=i:0).w|s-1-5-21-962155459-1177681987-1237804090-74654, AppPrincipalName= ,bstrUrl=http://<my site>/personal/<user account> ,bstrStartUrl=Social/Private/FollowedSites,ListDocsFlags=24584 ,bThrowException=False       a0fa9d9c-f590-6094-c775-fb7648d76852

System.UnauthorizedAccessException: <nativehr>0x80070005</nativehr><nativestack></nativestack>Access is denied., StackTrace:    at Microsoft.SharePoint.SPWeb.GetFileOrFolderProperties(String strUrl, ListDocsFlags listDocsFlags, Boolean throwException, SPBasePermissions& permMask)     at Microsoft.SharePoint.SPFolder.PropertiesCore(Boolean throwException)     at Microsoft.SharePoint.SPFolder.get_Exists()     at Microsoft.Office.Server.UserProfiles.SPSocialDataStore.EnsureNamespaceExists(String ns, String scopeName, Boolean secured)     at Microsoft.Office.Server.UserProfiles.SPSocialDataStore.WriteFollowedItem(FollowedItem item, FollowedItemData data)     at Microsoft.Office.Server.UserProfiles.SPSocialDataStore.Follow(FollowedItem item, FollowedItemData data, Boolean checkLimit)     at Mic…    a0fa9d9c-f590-6094-c775-fb7648d76852

…rosoft.Office.Server.UserProfiles.FollowedContent.FollowItem(FollowedItem item, Boolean isInternal)     at Microsoft.Office.Server.UserProfiles.FollowedContent.Follow(Uri url, FollowedItemData data)     atMicrosoft.SharePoint.Portal.ContentFollowingFeatureReceiver.AutoFollowWeb(SPWeb web)     at Microsoft.SharePoint.Portal.ContentFollowingFeatureReceiver.FeatureActivated(SPFeatureReceiverProperties properties)     at Microsoft.SharePoint.SPFeature.DoActivationCallout(Boolean fActivate, Boolean fForce)     at Microsoft.SharePoint.SPFeature.Activate(SPSite siteParent, SPWeb webParent, SPFeaturePropertyCollection props, SPFeatureActivateFlags activateFlags, Boolean fForce)

System.UnauthorizedAccessException: Access denied., StackTrace:  

 at Microsoft.SharePoint.SPWeb.GetFileOrFolderProperties(String strUrl, ListDocsFlags listDocsFlags, Boolean throwException, SPBasePermissions& permMask)   

 at Microsoft.SharePoint.SPFolder.PropertiesCore(Boolean throwException)   

 at Microsoft.SharePoint.SPFolder.get_Exists()   

 at Microsoft.Office.Server.UserProfiles.SPSocialDataStore.EnsureNamespaceExists(String ns, String scopeName, Boolean secured)   

 at Microsoft.Office.Server.UserProfiles.SPSocialDataStore.WriteFollowedItem(FollowedItem item, FollowedItemData data)   

 at Microsoft.Office.Server.UserProfiles.SPSocialDataStore.Follow(FollowedItem item, FollowedItemData data, Boolean checkLimit)   

 at Microsoft.Office.Server.UserProfiles.FollowedContent.FollowItem(FollowedItem item, Boolean isInternal)   

 at Microsoft.Office.Server.UserProfiles.FollowedContent.Follow(Uri url, FollowedItemData data)   

 at Microsoft.SharePoint.Portal.ContentFollowingFeatureReceiver.AutoFollowWeb(SPWeb web)   

 at Microsoft.SharePoint.Portal.ContentFollowingFeatureReceiver.FeatureActivated(SPFeatureReceiverProperties properties)   

 at Microsoft.SharePoint.SPFeature.DoActivationCallout(Boolean fActivate, Boolean fForce)   

 at Microsoft.SharePoint.SPFeature.Activate(SPSite siteParent, SPWeb webParent, SPFeaturePropertyCollection props, SPFeatureActivateFlags activateFlags, Boolean fForce)   

 at Microsoft.SharePoint.SPFeatureCollection.AddInternal(SPFeatureDefinition featdef, Version version, SPFeaturePropertyCollection properties, SPFeatureActivateFlags activateFlags, Boolean force, Boolean fMarkOnly)   

 at Microsoft.SharePoint.SPFeatureCollection.AddInternalWithName(Guid featureId, Int32 compatibilityLevel, String featureName, Version version, SPFeaturePropertyCollection properties, SPFeatureActivateFlags activateFlags, Boolean force, Boolean fMarkOnly, Boolean fIgnoreMissing, SPFeatureDefinitionScope featdefScope)   

 at Microsoft.SharePoint.WebControls.FeatureActivator.ActivateFeature(Guid featid, Int32 compatibilityLevel, SPFeatureDefinitionScope featdefScope)   

 at Microsoft.SharePoint.WebControls.FeatureActivatorItem.ToggleFeatureActivation()   

 at System.Web.UI.WebControls.Button.RaisePostBackEvent(String eventArgument)   

 at System.Web.UI.Page.ProcessRequestMain(Boolean includeStagesBeforeAsyncPoint, Boolean includeStagesAfterAsyncPoint)   

 at System.Web.UI.Page.ProcessRequest(Boolean includeStagesBeforeAsyncPoint, Boolean includeStagesAfterAsyncPoint)   

 at System.Web.UI.Page.ProcessRequest()   

 at System.Web.UI.Page.ProcessRequest(HttpContext context)   

 at System.Web.HttpApplication.CallHandlerExecutionStep.System.Web.HttpApplication.IExecutionStep.Execute()   

 at System.Web.HttpApplication.ExecuteStep(IExecutionStep step, Boolean& completedSynchronously)   

 at System.Web.HttpApplication.PipelineStepManager.ResumeSteps(Exception error)   

 at System.Web.HttpApplication.BeginProcessRequestNotification(HttpContext context, AsyncCallback cb)   

 at System.Web.HttpRuntime.ProcessRequestNotificationPrivate(IIS7WorkerRequest wr, HttpContext context)   

 at System.Web.Hosting.PipelineRuntime.ProcessRequestNotificationHelper(IntPtr rootedObjectsPointer, IntPtr nativeRequestContext, IntPtr moduleData, Int32 flags)   

 at System.Web.Hosting.PipelineRuntime.ProcessRequestNotification(IntPtr rootedObjectsPointer, IntPtr nativeRequestContext, IntPtr moduleData, Int32 flags)   

 at System.Web.Hosting.UnsafeIISMethods.MgdIndicateCompletion(IntPtr pHandler, RequestNotificationStatus& notificationStatus)   

 at System.Web.Hosting.UnsafeIISMethods.MgdIndicateCompletion(IntPtr pHandler, RequestNotificationStatus& notificationStatus)   

 at System.Web.Hosting.PipelineRuntime.ProcessRequestNotificationHelper(IntPtr rootedObjectsPointer, IntPtr nativeRequestContext, IntPtr moduleData, Int32 flags)   

 at System.Web.Hosting.PipelineRuntime.ProcessRequestNotification(IntPtr rootedObjectsPointer, IntPtr nativeRequestContext, IntPtr moduleData, Int32 flags) 

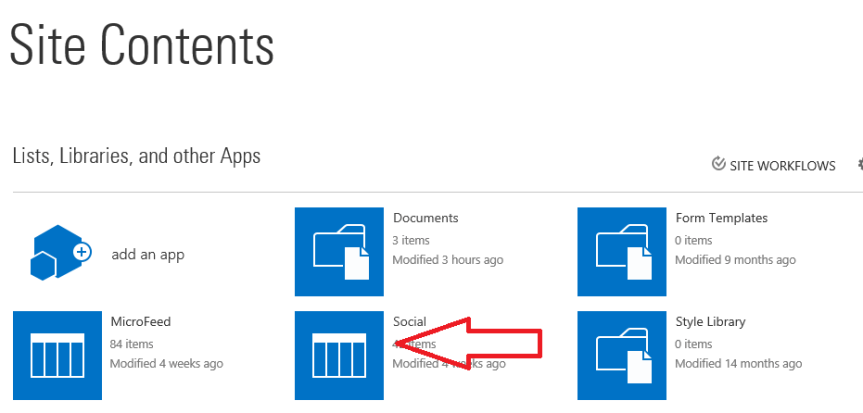
So as you can see in the uls logs it’s throwing an Unauthorized access exception error  while you’re trying to activate the feature and it points to a different user’s My site social list and not to the current user’s My site social list who’s trying to activate the feature .

If you’re wondering where to find the social list , you can find it in your “My site”…

social list

So now when we asked the user who was shown as exception to activate the feature it worked perfectly fine, the user was able to activate it. So we started researching about this in the internet and after loads of effort we were finally able to find a blog article where the author clearly described about what happens in the background when you’re trying to activate this feature on a site.

So this is what exactly happens when you’re trying to activate a site feature and mentioned below (screenshot below) is the code for the site feature activate method.

9

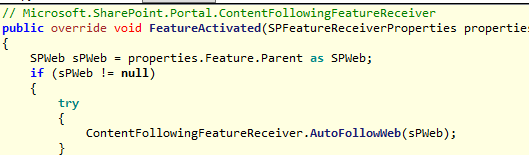
It makes a call to the AutoFollowWeb() and mentioned below is the code for that…

10

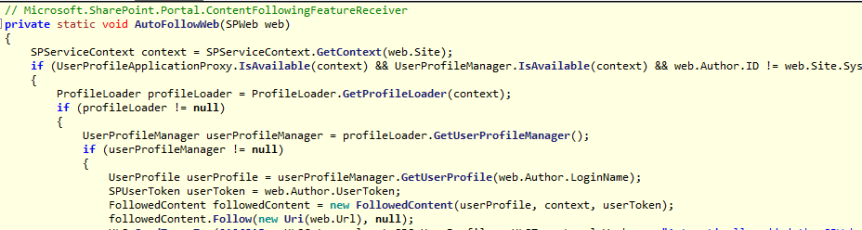
Now, please notice the last few lines in the above code….It’s looking for the author (person who created this site) of the site to activate the feature and not the current logged on user …

UserProfile userProfile = userProfileManager.GetUserProfile(web.Author.LoginName);

       SPUserToken userToken = web.Author.UserToken;

       FollowedContent followedContent = new FollowedContent(userProfile, context, userToken)

So this means only the author (the person who created this site) would be able to activate this feature and not others even though they are added as SCA’s.

Few Gotchas…

  1. Only the person who created the site would be able to activate this feature and not others, even though they are present in the SCA group.
  2. The “site follow” feature will by default look only for the author of the site and not the person who’s trying to activate this feature.
  3. Once the author activates this feature then other users would be able to click on the “follow” button and follow the site.

I bet now you would have had a clear understanding about this issue. If you’re facing this issue in your environment then I would suggest to open a support case with Microsoft and work with them on this issue. Also I guess if you try to add yourself as a  site collection admin to the author’s personal site collection then I believe you would be able to activate this feature on all the sites which was created by that user (However, I haven’t tried that option yet ) .

Thanks for reading this post …Happy SharePointing!!!!
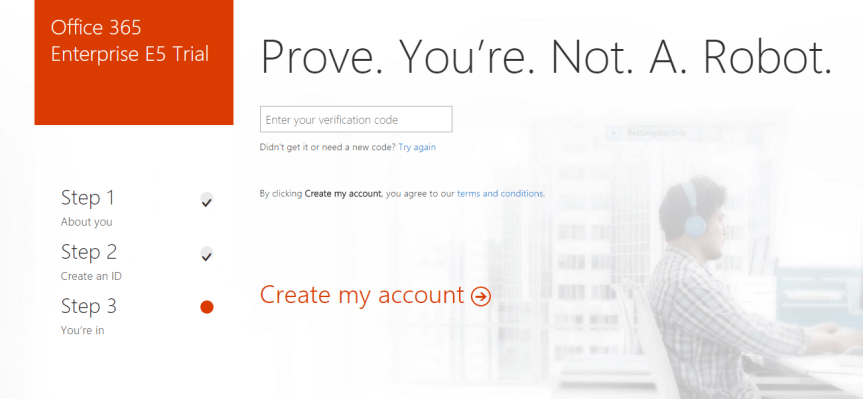
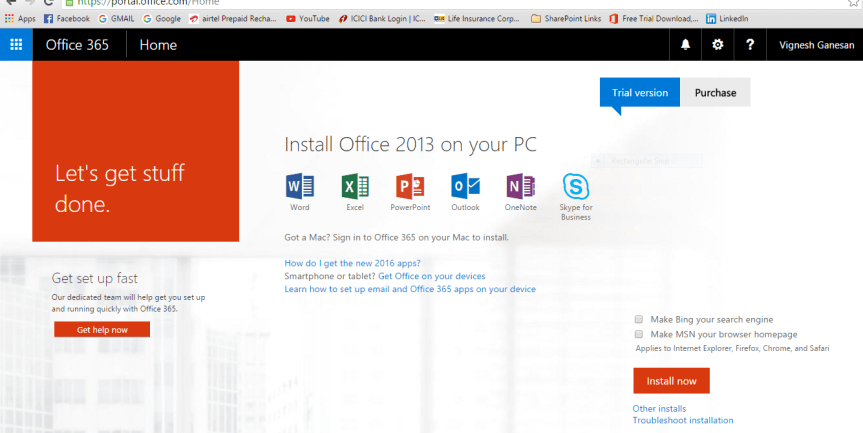
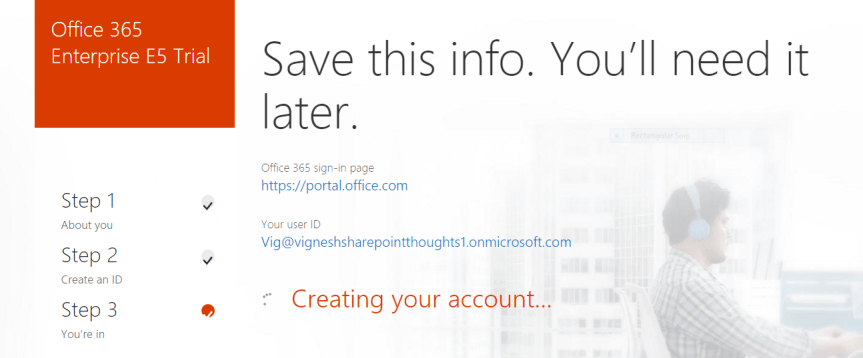
Adding an SSL Certificate to SharePoint 2013:

Before we could jump in and discuss about how to add an SSL certificate to a SharePoint web application, how about a brief description on SSL certificates and it types and usage. So let’s start with what is an SSL Certificate first…

We all know that the usage of SSL Certificates has increased rapidly and henceforth the applications which make use of SSL Certificates has also indeed increased rapidly over a period of time.

Now the reason for organizations to use SSL certificates is quite obvious as it provides security/encryption to the content that is been viewed/accessed by the users.

Some organizations wish to use SSL to enhance trust in their security and identity, e.g. they want to show their customers that they have been vetted by an authorized certificate provider and are a legitimate organization.

So, What is an SSL Certificate?

SSL stands for Secure Sockets Layer. It provides a secure connection between internet browsers and websites, allowing you to transmit private data online. Sites secured with SSL display a padlock in the browsers URL and possibly a green address bar if secured by an SSL Certificate.

So what is SSL used for? The SSL protocol is used by millions of e-Business providers to protect their customers, ensuring their online transactions remain confidential. A web page should use encryption expected to submit confidential data, including credit card details, passwords or any personal information. All web browsers have the ability to interact with secured sites so long as the site’s certificate is from a recognized certificate authority.

How to identify whether a site uses SSL Certificate?

When a digital certificate is installed on a web page, users will see a padlock icon in the browser address bar. When an Extended Validation Certificates is installed on a web site, the address bar will turn green during secure sessions.

Users on sites with SSL Certificates will also see : https:// in the address bar

1

2

3

What are the different types of SSL Certificates?

Extended Validation (EV) SSL Certificates: where the Certificate Authority (CA) checks the right of the applicant to use a specific domain name PLUS it conducts a THOROUGH vetting of the organization. The issuance process of EV SSL Certificates is strictly defined in the EV Guidelines, as formally ratified by the CA/Browser forum in 2007, that specify all the steps required for a CA before issuing a certificate, and includes:

  • Verifying the legal, physical and operational existence of the entity
  • Verifying that the identity of the entity matches official records
  • Verifying that the entity has exclusive right to use the domain specified in the EV SSL Certificate
  • Verifying that the entity has properly authorized the issuance of the EV SSL Certificate

EV SSL Certificates are available for all types of businesses, including government entities and both incorporated and unincorporated businesses. A second set of guidelines, the EV Audit Guidelines, specify the criteria under which a CA needs to be successfully audited before issuing EV SSL Certificates. The audits are repeated yearly to ensure the integrity of the issuance process.

Organization Validation (OV) SSL Certificates: where the CA checks the right of the applicant to use a specific domain name PLUS it conducts some vetting of the organization. Additional vetted company information is displayed to customers when clicking on the Secure Site Seal, giving enhanced visibility in who is behind the site and associated enhanced trust.

Domain Validation (DV) SSL Certificates: where the CA checks the right of the applicant to use a specific domain name. No company identity information is vetted and no information is displayed other than encryption information within the Secure Site Seal.

Now, let’s jump into the steps to install SSL certificate to a SharePoint web application using IIS 8.

Note: The SSL Certificate provider in this case is DigiCert

  1. So first you need to start with saving the SSL Certificate file ((your_domain_name.cer) )  to the server on which the CSR was generated.
  2. Open Internet Information Services (IIS) Manager–>From the Start screen, type and click Internet Information Services (IIS) Manager.
  3. In Internet Information Services (IIS) Manager, under Connections, select your server’s Hostname.

4

4. On the main menu, under IIS section, double-click the Server Certificates

5. In the Actions menu, click Complete Certificate Request to open the Complete Request Certificate .

5

6. On the Specify Certificate Authority Response page, under File name containing the certification authority’s response, click  to browse to the .cer certificate file that DigiCert sent you, select the file, and then, click Open.

6

7.Next, in the Friendly name box, enter a friendly name for the certificate. The friendly name is not part of the certificate; instead, it is used to identify the certificate. It’s recommended that you add DigiCert and the expiration date to the end of your friendly name, for example: (yoursite-DigiCert-expirationDate). This information helps identify the issuer and expiration date for each certificate. It also helps distinguish multiple certificates with the same domain name.

8.Next, in the Select a certificate store for the new certificate drop-down list, select Personal.

9.To install the SSL Certificate to the server, click OK.

10.Once you have successfully installed the SSL Certificate to the server, you still need use IIS manager to assign or bind that certificate to the SharePoint site.

11. Now, go to Internet Information Services (IIS) Manager, under Connections, expand your server’s name, expand Sites, and then select the SharePoint site.

7

12.In the Actions menu, under Edit Site, click Bindings.

13. In the Site Binding window, click Add.

8

14. In the Add Site Bindings window, enter the following information:

Type: In the drop-down list, select https.
 
IP address: In the drop-down list, select All unassigned( If you’re wondering about what “All unassigned “means, it simply means all IP addresses and not specially the IP address assigned to the current server alone )
If your server has multiple IP addresses, select the one that applies.
 
Port: Enter 443, unless you are using a non-standard port for SSL traffic.
 
SSL certificate: In the drop-down list, select the friendly name of the certificate that you just installed.

9

15. When you are finished, click OK.

10

16. Once this is done, we need to install the root certificate on the SharePoint 2013 server.

17. For that, log into your certificate provider account. (I’m going with DigiCert here …)

18. Go to DigiCert® Management Console, under Order, click the order number for the SSL Certificate that you just installed.

19. On the My Orders tab, click Download.

18

20. In the Download Certificate section, click the Download or Copy/Paste Individual Certificates .

11

21. Next, click the ROOT CERTIFICATE icon.12

22. In the Opening TrustedRoot.crt window, click Save File to save the file to your SharePoint server.

13

23. Once all this is done , go to SharePoint 2013 Central Administration

24. In SharePoint 2013 Central Administration, in the menu on the left, click Security and then, under General Security, click Manage trust.

14

25. On the Trust Relationships page, in the menu at the top of the page, click New.

15

26. In the Establish Trust Relationship window, in the General Setting section, in the Name box, type the name that you want to give the SSL Certificate.

16

27. In the Root Certificate for the trust relationship section, click Browse to browse for and select the root certificate (i.e. crt).

28. In the Establish Trust Relationship window, click OK.

29. If the certificate is installed successfully, it should be listed on the Trust Relationships page.17


30. That’s it, you’re done!!!

Thanks for reading this post .Happy SharePointing!!!