
This is going to be a simple article where I’ll be explaining how to sign up for a free Office 365 trial plan and make use of its services. As you must be aware, Office 365 gives you a one month free trial version where you can sign in for Office 365 and play around with the services and gain some knowledge on what Office 365 is all about, what are the services it offers and how to manage users/services etc.…
I’m going to make this post pretty basic by just discussing the steps involved in signing up for an Office 365 trial version and utilizing the services offered by it. So if you’re someone who is new to Office 365 and would like to understand how to get started with using Office 365 services, then this article would be a good primer article for you guys …..
Alright let’s jump in …
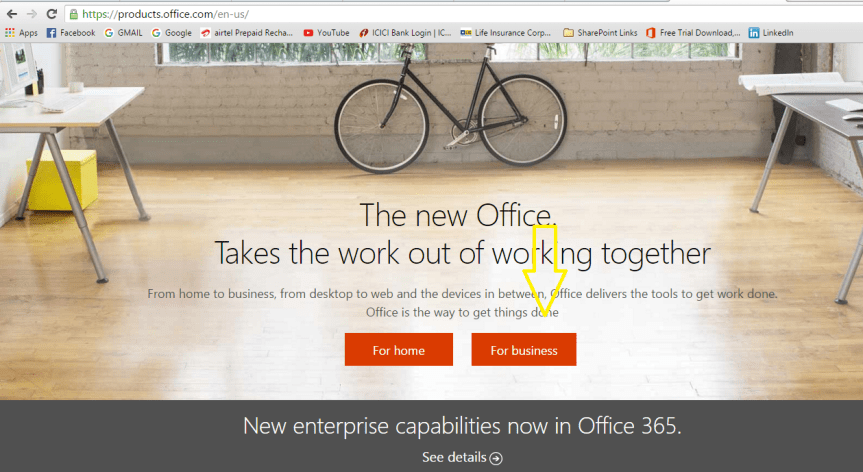
- Please go to https://products.office.com as shown in the screenshot below.
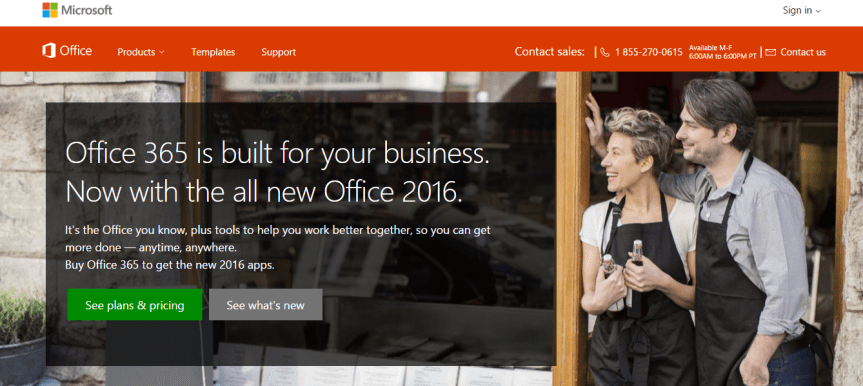
2. Choose “For business” option, it will take you to a screen as show below. You can also choose “For home” if you would like to explore the features in that plan. I’m going with the business option here as it gives you more features when compared with the home plan.
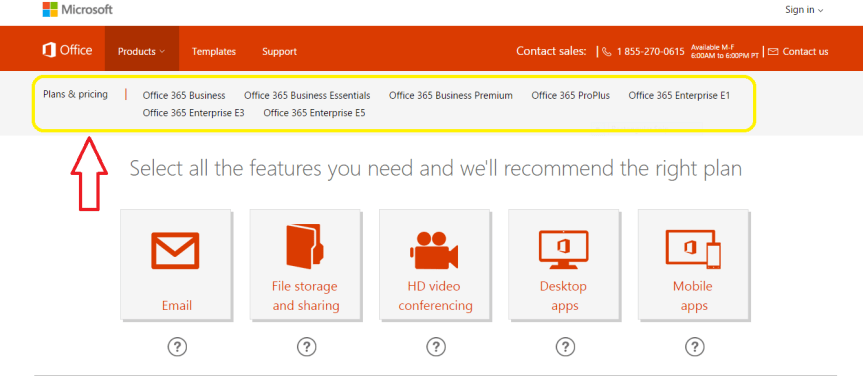
3. Once you’re done clicking “For business” option, it’s going to take you to a screen as shown below. You can notice all the available Office 365 business plans here …If you scroll down it would give you a detailed explanation about what’s included in each plan and the licensing cost. So carefully take a look at the plans before choosing it.
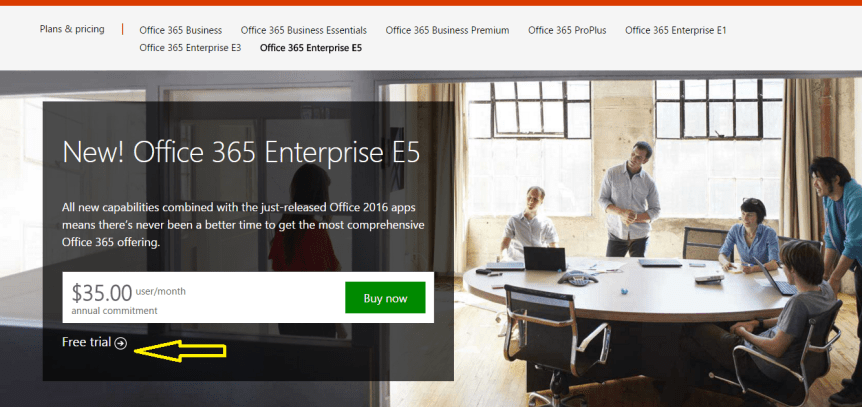
4. I’m choosing the “Office 365 Enterprise E5 “free trial plan as you can see in the screenshot below. You need to click on the “Free trial “button if you want to subscribe for a trail version. Also please notice that the free trail plan is valid only for one month.
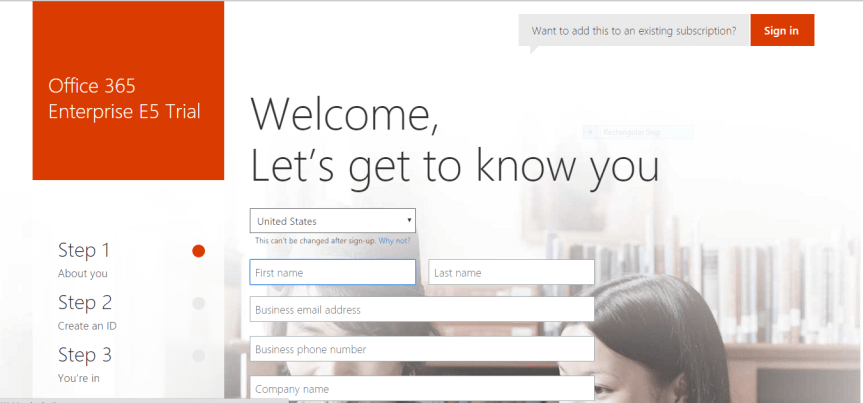
5. You would be taken to a form as shown in the screenshot below asking for your details. Please fill in the appropriate information and click next. Also please bear in mind that you won’t be able to change your country after you have successfully signed up for Office 365.
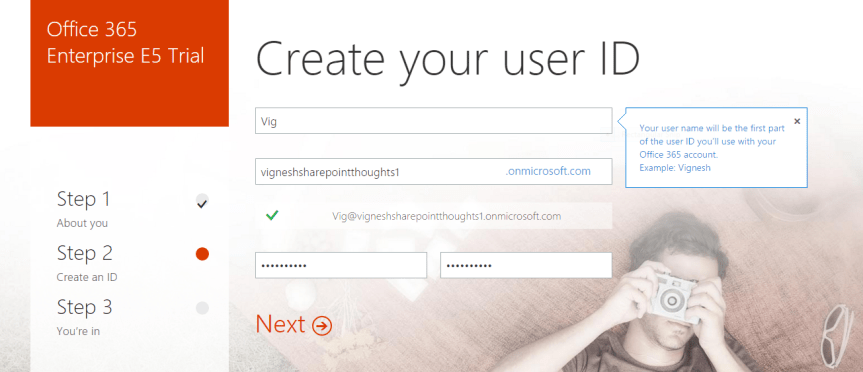
6. The next screen would be asking your username, password & Company name .Please key in those values and click next
Note: The Company name which you key in here will become a part of your Office 365 tenant url , SharePoint Online sites url , Skype for Business meeting url & Email addresses of those users who are synced with Office 365. Also while entering the Company name, please make sure that you’re entering an imaginary name or the name of a domain that you own and not a real company name .It’s strictly not recommended to enter your company name without consulting your IT team .
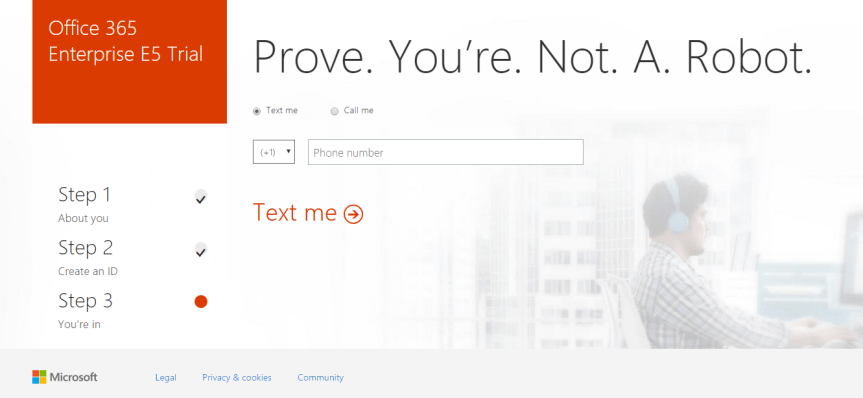
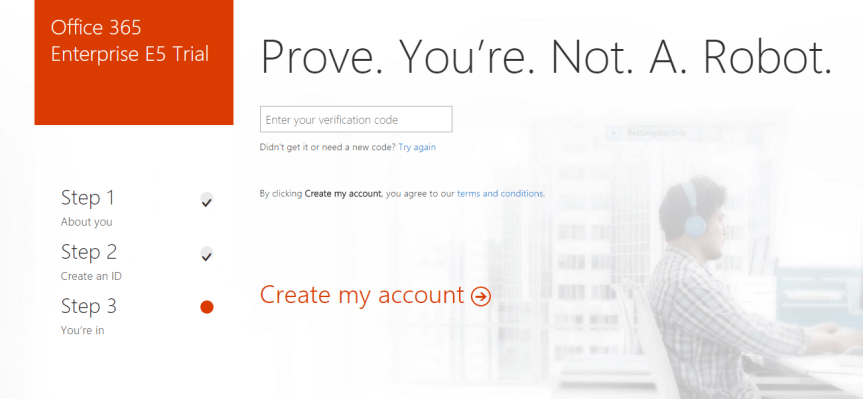
7. Once you’re done entering the values, click next and it’s going to ask you to enter your mobile number just to make sure that you’re not a robot. So enter your mobile number and then key in the verification code which is sent to you as a text.
8. Once you’re done entering all these details you’re all set now and you will see the below mentioned screen which says that its saving all your details …
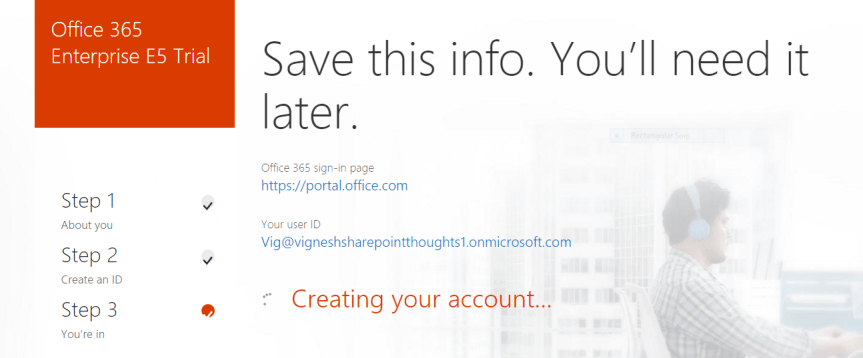 9. Please remain patient for few mins until your Office 365 tenant is completely set up, you will get a screen like this as shown in the screenshot below.
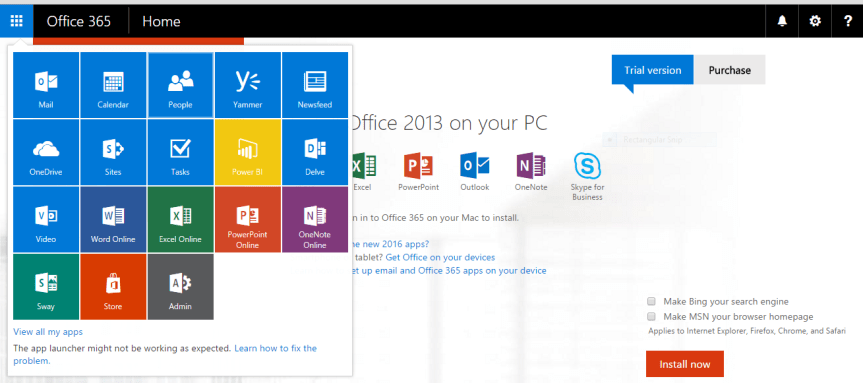
10 .However , please note that by this time your Office 365 tenant is not yet completely set up .The app launcher is still configuring things for you …so please remain patient for few more minutes . You can click the app launcher and check the status….
You can see the note which says, “Setting up “.

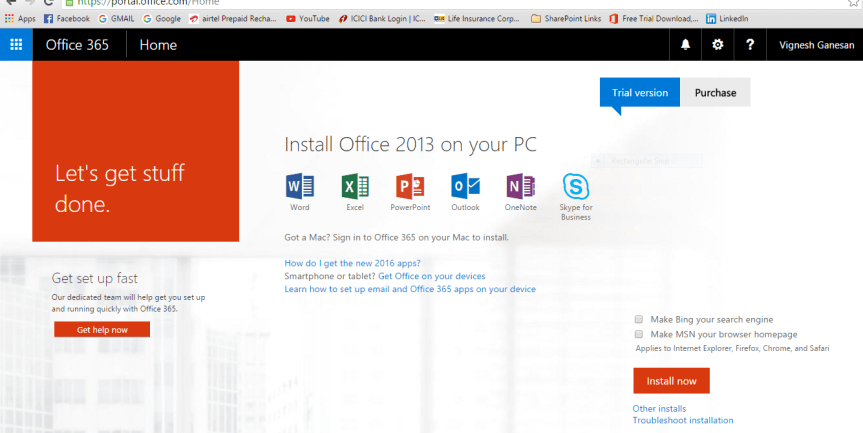
11. So finally after few minutes, you can notice the apps getting displayed in the app launcher indicating that your Office 365 tenant is set up successfully.
12. You can also take a look at the “service overview” page to check the health status of all the services.
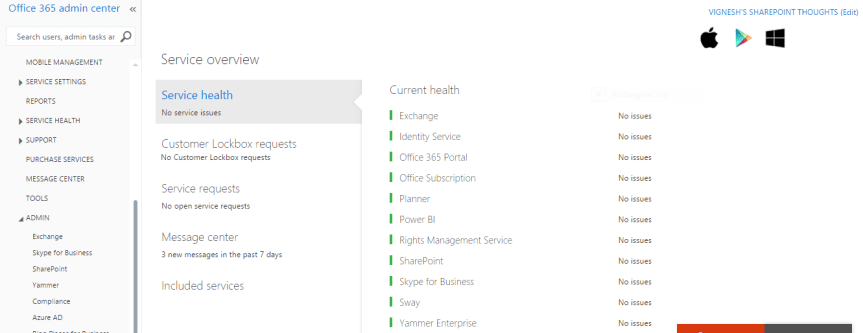
13. Please click on the “Admin” option towards your left hand side to access all the services.
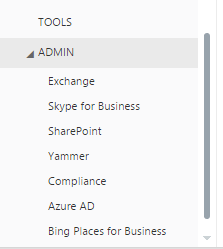
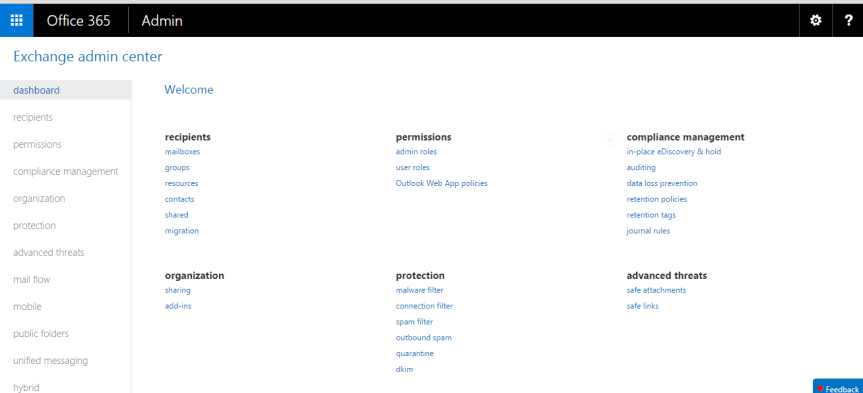
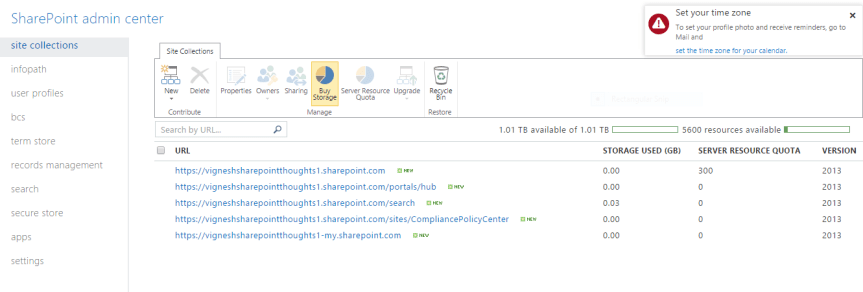
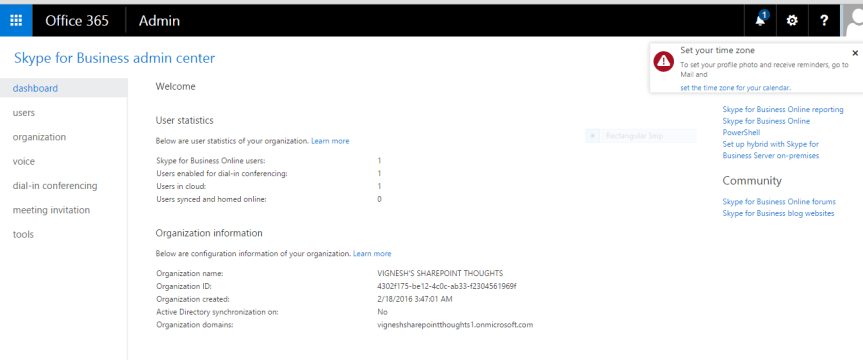
14. This is how the admin center for each service looks like ….
For Exchange …
For SharePoint …
For Skype for Business …
15. You can use the “USERS” option towards your left hand side to manage users and their licenses in the Office 365 admin center.
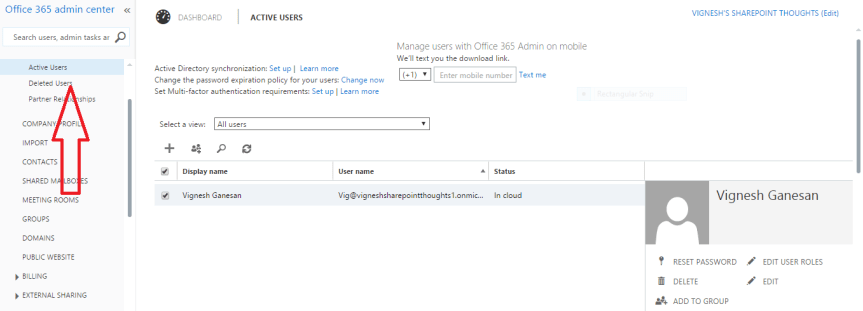
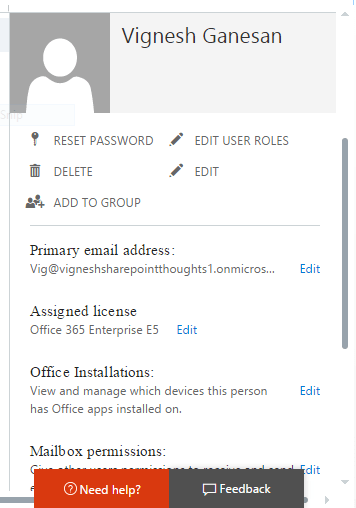
16. To make any changes to a user’s account such as resetting his/her password , edit the user’s details and to assign licenses etc. …please select the user first and then it will give you an option towards your right hand side to do that …(please see below )
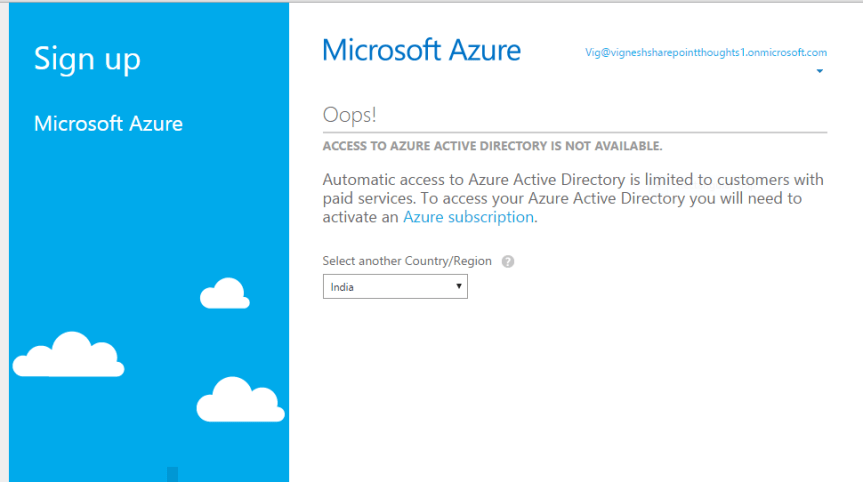
17. Azure Active Directory is only available for paid customers, so if you’re trying to access it on a trial version you’re likely gonna end up with the error as shown in the screenshot below.
18. I’ve also created few more articles in my blog about Office 365 Identity management, Office 365 Troubleshooting tools, Useful Office 365 PowerShell commands & Required ports for Office 365 implementation…Please go through the below mentioned links to read them.
Office 365 Identity management
Office 365 Troubleshooting Tools
Thanks for reading this post!!!
