Configuring Windows PowerShell to support SPO management shell, Exchange Online Management Shell, Skype for Business Online Management Shell and Office 365 Compliance center:

office3652.jpg

Good evening  to all the Office 365 nerds out there, this article would be on how to configure Windows PowerShell in your client operating system to support Office 365 (i.e. SharePoint Online Management shell, Exchange Online Management Shell, Skype for Business Online Management Shell and Office 365 Security & Compliance center). Well it’s a known fact that Microsoft has released the PowerShell module for all these products (SharePoint Online, Exchange Online, Skype for Business Online and Office 365 Security & Compliance center) separately and you can use that to manage these products separately .Listed below are the links to download those modules .

SharePoint Online Management shell: _ https://www.microsoft.com/en-us/download/details.aspx?id=35588

Skype for Business Online module: _ https://www.microsoft.com/en-us/download/details.aspx?id=39366

Exchange Online module: _ https://technet.microsoft.com/en-us/library/jj984289(v=exchg.160).aspx

Office 365 Security & Compliance center: _ https://technet.microsoft.com/en-us/library/mt587091(v=exchg.160).aspx

Azure AD Module (this can be used for user and domain management tasks in Office 365): _ https://msdn.microsoft.com/en-us/library/jj151815.aspx .

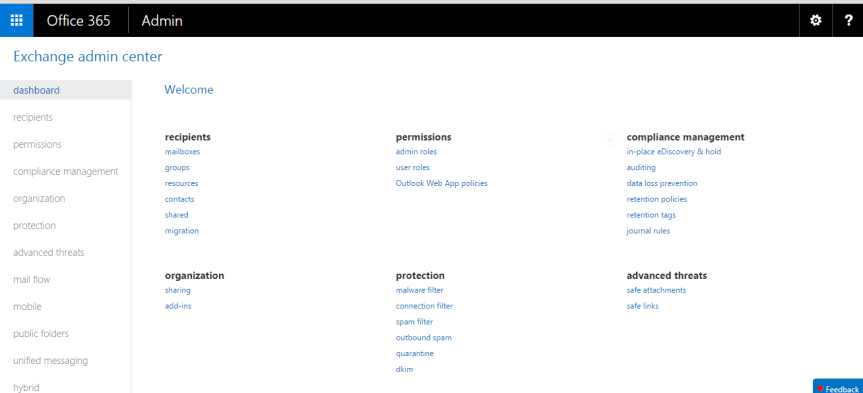
So if you’re the guy who plays the IT administrator role in your company and if you’re the one who has Office 365 global admin role assigned to you and takes care of managing Office 365 then chances are that your desktop could look very messy as shown in the image below while you’re using the management shell and you’re definitely going to have hard time managing them .

29.png

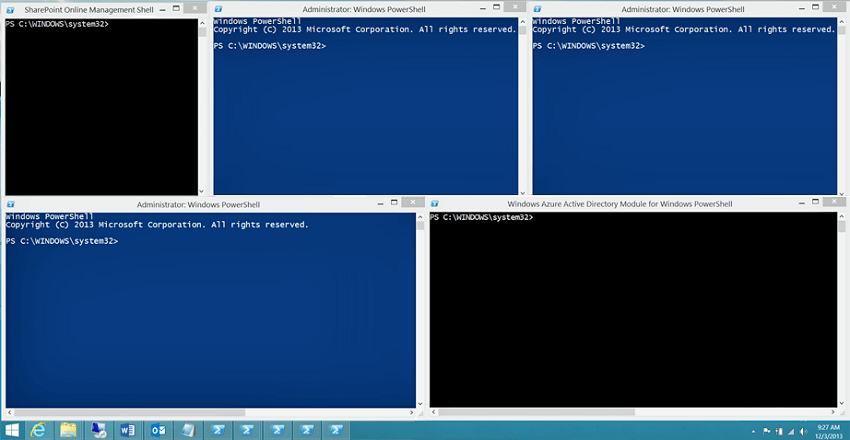
So the idea here is to show guys how to configure PowerShell to support all these modules and be successful in managing Office 365 from a single PowerShell window.

Let’s get into the detailed steps now:

Note: Please bear in mind that you need to have Office 365 global admin access to perform these steps.

  1. Please install the Microsoft .NET Framework 4.5.x and then either the Windows Management Framework 3.0 or the Windows Management Framework 4.0. in your PC.

Windows Management Framework 3.0:_ https://www.microsoft.com/en-us/download/details.aspx?id=34595

Windows Management Framework 4.0:_ https://www.microsoft.com/en-us/download/details.aspx?id=40855

  1. For Skype for business online module to function, you need a 64-bit operating system and hence please make sure you’re running a 64 bit version of Windows. Else you will end up getting an error  message as shown in the image below.

31.png

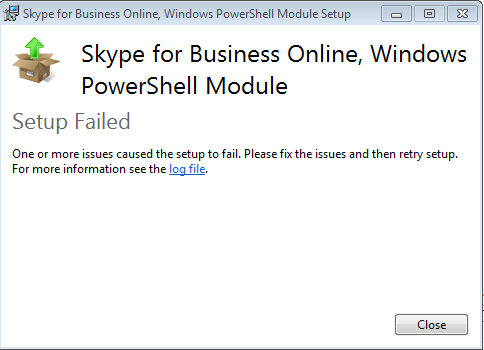
3.  Listed below are the 64-bit version of Windows that you can use

                                Windows 8.1 or Windows 8

                                Windows Server 2012 R2 or Windows Server 2012

                                Windows 7 Service Pack 1 (SP1)*

                                Windows Server 2008 R2 SP1*

  1. Once that’s done you need to install the modules that are required for Office 365, SharePoint Online, and Skype for Business Online. Listed below are the links to download those modules.

Microsoft Online Service Sign-in Assistant for IT Professionals RTW

Windows Azure Active Directory Module for Windows PowerShell (64-bit version)

SharePoint Online Management Shell

Skype for Business Online, Windows PowerShell Module

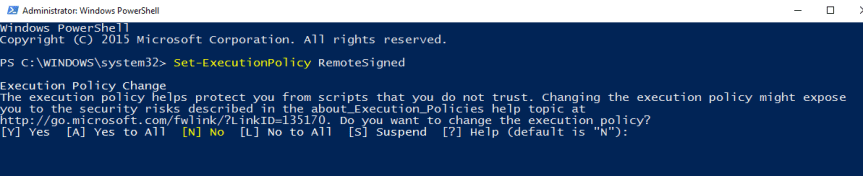
5. Once you’re done installing all the modules you need to configure Windows PowerShell to run signed scripts for Skype for Business Online, Exchange Online, and the Security & Compliance Center. To do this, run the following command in an elevated Windows PowerShell session

Set-ExecutionPolicy RemoteSigned

1

6. Now inorder to identify whether you’re running Windows PowerShell using elevated permissions or normal mode, please check the prompt on your PowerShell screen.

PS C:\Windows\System32> –>Elevated permissions

 PS C:\Users\UserName>–>Normal mode

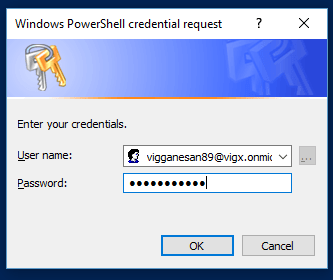
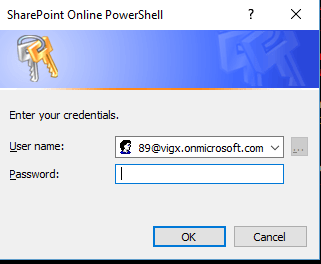
7. Now run the next below mentioned command to pass your Office 365 user name and password to Windows PowerShell in an encrypted way. Once that’s done you will get a windows dialog box prompting for your credentials as shown in the image below.

$credential = Get-Credential

2

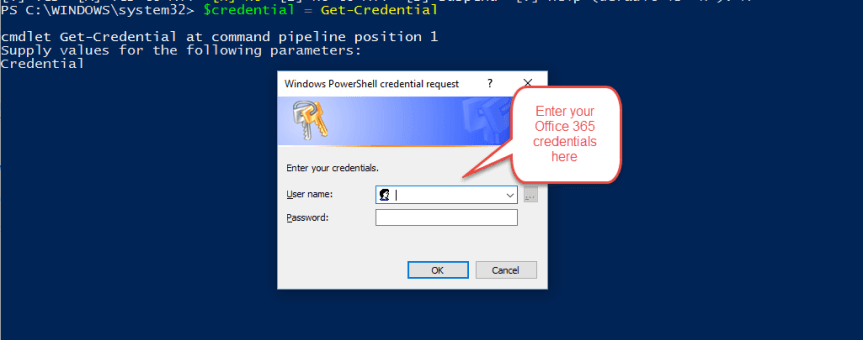
8. Now key-in your Office 365 credentials and click on OK as shown below.

3

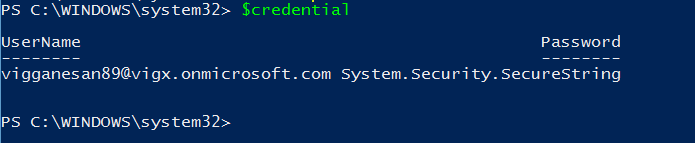
9. In-order to identify whether your credential object has been created successfully, please run the below mentioned command as shown in the image below and it should return the value.

Note: Windows PowerShell will never tell you anything when things go fine, it will silently pass on to the next line .It only yells at you when something went wrong. That’s the funny thing about Windows PowerShell.

$credential

30

10.  Now we are all good to and hence we can start connecting to Office 365, for that please run the below mentioned command.

Import-Module MsOnline

4

11. Once that’s done in-order to verify whether the module was imported successfully you need to run the below mentioned command. This should return the value as shown in the image below.                                Get-Module

12. Somewhere in the list of modules that are returned by this command you should see something that looks like this:  

  Manifest 1.0 MS Online {Add-MsolForeignGroupToRole, Add-MsolG…}.

If you see MSOnline listed, that means that everything went according to plan.

13. Since we have verified that the credential object has been created and also the MSOnline module has been loaded successfully the next step would be to connect to Office 365 using the Connect-MsolService cmdlet. For that run the below mentioned command as shown in the image below.

                                Connect-MsolService -Credential $credential

5

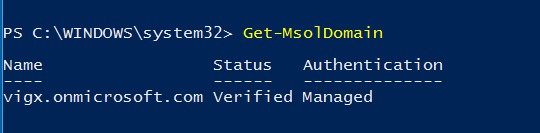
14. In-order to verify whether you have successfully logged into your Office tenant, please run the below mentioned command and verify your domain information as shown in the image below. In my case my domain name for Office 365 is “vigx” and you can see that in the image below.

                                                 Get-MsolDomain

32.png

15. After performing all the above mentioned we have successfully verified that we are able to establish a connection to the Office 365 tenant using our user name and password which has Global admin access in Office 365 . Now the next steps would be to create a connection to each modules separately (i.e. SharePoint Online, Exchange Online , Skype for Business Online & Security and Compliance center for Office 365 )

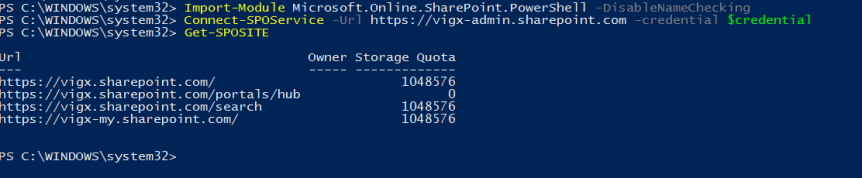
16 .Initially let’s get started with SharePoint Online by running the following command.   Import-Module Microsoft.Online.SharePoint.PowerShell –DisableNameChecking

Here the “DisableNameChecking” switch suppresses the below mentioned warning.

Warning: The names of some imported commands from the module ‘Microsoft.Online.SharePoint.PowerShell’ include unapproved verbs that might make them less discoverable. To find the commands with unapproved verbs, run the Import-Module command again with the Verbose parameter. For a list of approved verbs, type Get-Verb.

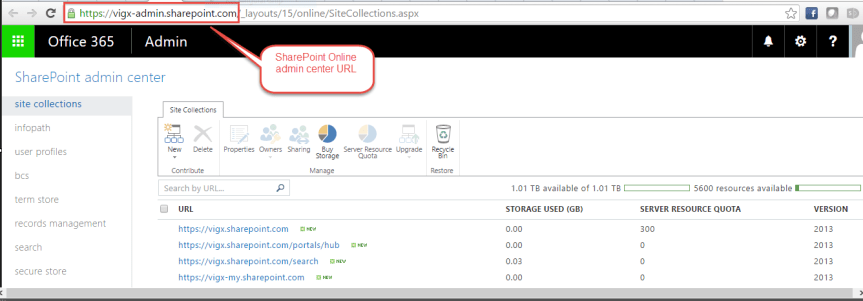
17. In order to connect to SharePoint Online, you need to supply two pieces of information: your credentials and the URL of your SharePoint Online admin site. This is how the format is going to look like.

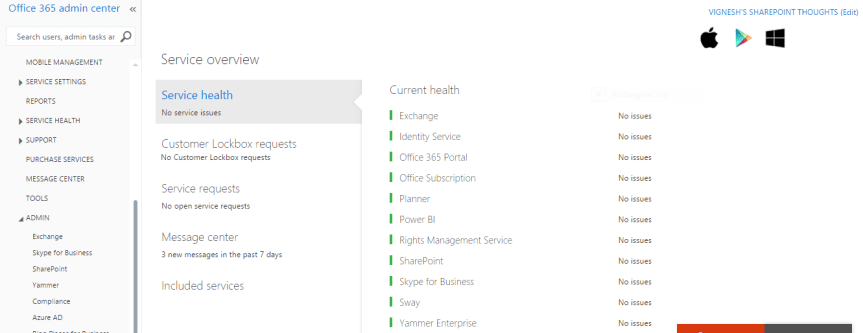
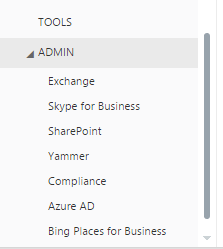
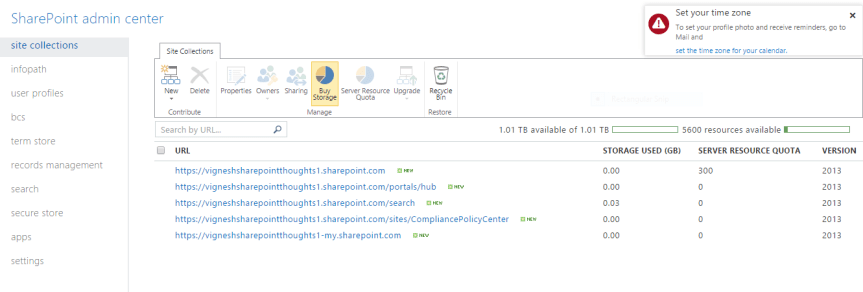
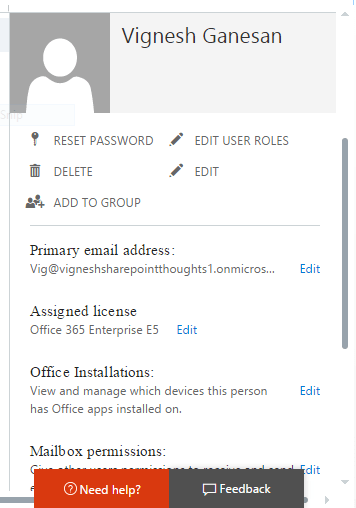
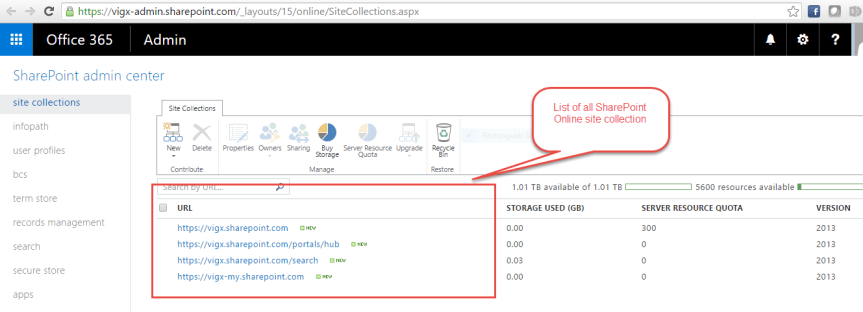
Note: You can get your SharePoint Online tenant URL by opening the tenant admin page. Check the screenshot below.

33

This is how the format will look like,

Admin URL: – https://vigx-admin.sharepoint.com   Connect-SPOService -Url https://vigx-admin.sharepoint.com -credential $credential

18. Once that’s done, please go ahead and run “Get-SPOSite” command as shown below and see the results .This should list all the SharePoint Online sites.

34.png

19. If you successfully get the list of all SharePoint Online sites then your command ran successfully.You can verify that by visiting the SharePoint Online admin center as shown below.

6.PNG

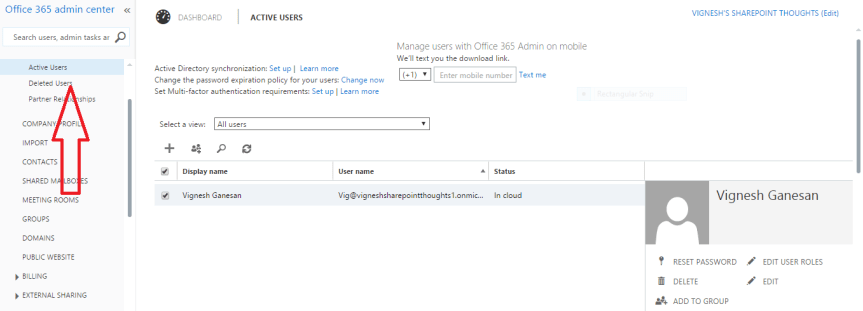
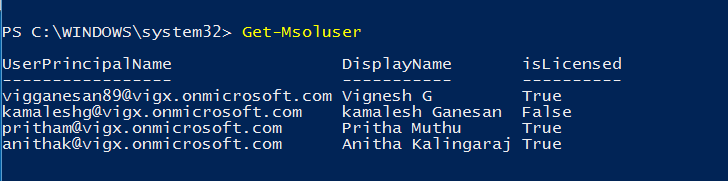
20. Also try running Get-MsolUser and see the result , this will return the list of all the users in Office 365 .This means you can now manage both SharePoint Online and Office 365 from the same Windows PowerShell window .

35.png


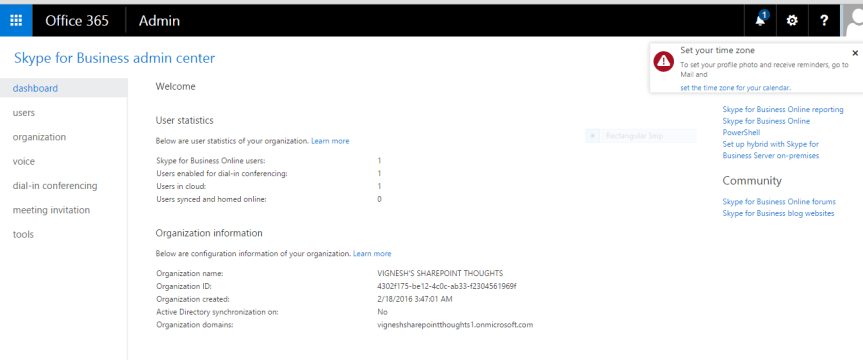
21. Now, let’s take a look on how to connect to Skype for Business Online (formerly as Lync Online)

Note:  Connecting to Skype for Business Online (and to Exchange Online or the Security & Compliance Center) is different than connecting to Office 365 or to SharePoint Online. That’s because the Skype for Business Online and Exchange Online cmdlets don’t get installed on your computer like the Office 365 and the SharePoint Online cmdlets do. Instead, each time you sign in, the appropriate cmdlets are temporarily copied to your computer. When you sign off, those cmdlets are then removed from your computer.

22. In order to connect to Skype for Business Online, please run the below mentioned command to import the Skype for Business Online module. For that run the below mentioned command.

                         Import-Module SkypeOnlineConnector

36.png

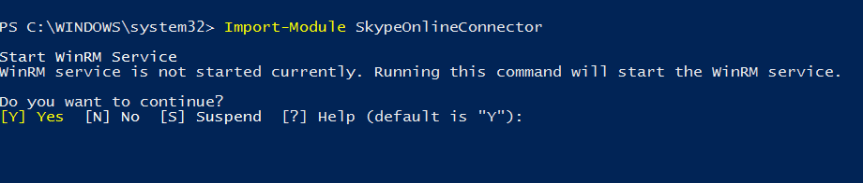
Note: The first time you might see some warning message which can be safely ignored.

23. Once the module has been imported, run the below mentioned command to initiate a new Sfbo session by running the below command.

$sfboSession = New-CsOnlineSession -Credential $credential

Note: By running the above command we have successfully created a remote PowerShell session. The above command is used to connect to an instance of Windows PowerShell running on one of the Office 365 servers.

37.png

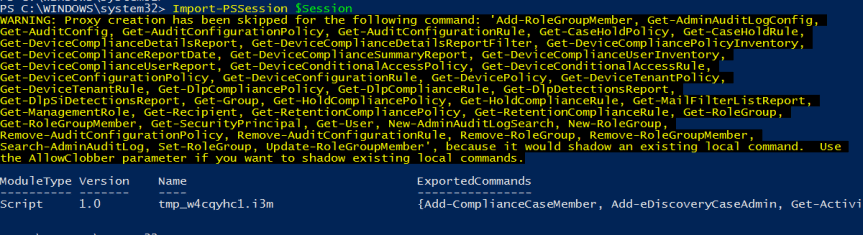
24. Once that’s done you need to run the below mentioned command to download the “Skye for Business Online scripts /cmdlets” and other items. As already mentioned before Skype for Business Online commands are not similar to SPO cmdlets, Sfbo cmdlets need to be loaded every time you plan to use PowerShell to manage Sfbo. So now let’s load sfbo cmdlets to PowerShell by running the below mentioned command(you can notice the progress bar in the image below loading the cmdlets to Windows PowerShell)

Import-PSSession $sfboSession

10.png

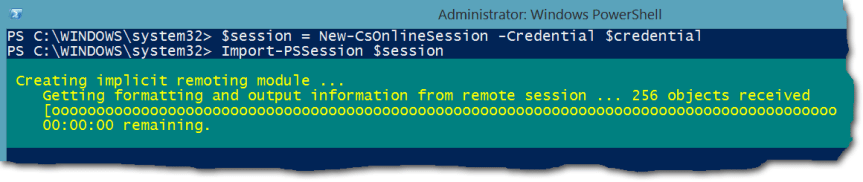
25. Once Windows PowerShell is done loading the sfbo cmdlets you should notice something like this as shown in the image below. If you notice this in your screen then you have successfully made a connection to Skype for Business Online.

11

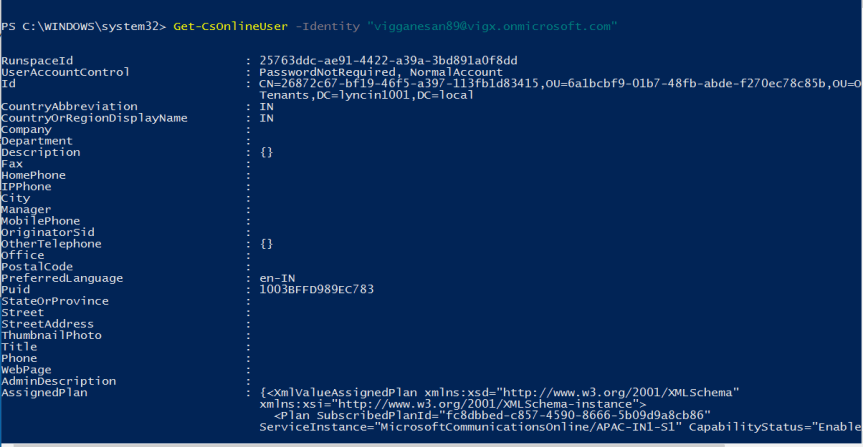
26. You can verify your connection to Skype for Business Online by running the below mentioned command.

Get-CsOnlineUser -Identity vigganesan89@vigx.onmicrosoft.com 

Note: This command will give the information for the user who has his UPN/SIP ID as vigganesan89@vigx.onmicrosoft.com

16

27.  Alright, till now we have seen how to configure Windows PowerShell to support SharePoint Online and Skype for business online, now let’s take a look on how to configure Windows PowerShell to support Exchange Online.

28. In order to proceed further, please run the below mentioned command which creates a remote Windows PowerShell session with Exchange Online.

$exchangeSession = New-PSSession -ConfigurationName Microsoft.Exchange -ConnectionUri “https://outlook.office365.com/powershell-liveid/” -Credential $credential -Authentication “Basic” -AllowRedirection

Note: Why is the command for connecting to Exchange Online more complicated than the command to connect to Skype for Business Online? Technically, it’s not: both commands do the exact same thing. However, the Skype for Business Online team created its own cmdlet—New-CsOnlineSession—that hides some of the parameters (like Authentication and AllowRedirection) that are used when connecting to Exchange Online. Instead of requiring you to type that information yourself, the Authentication and AllowRedirection parameters are effectively built in to the New-CsOnlineSession cmdlet. You have to type those parameters when connecting to Exchange Online because Exchange Online uses the standard New-PSSession cmdlet to connect to Office 365. The disadvantage is that you have a little more typing to do. The advantage is that you don’t have to download and install an Exchange Online module. This will start loading the modules as shown in the screenshot below.

13.png

29. Once you’re done running the above command, please run the below command to import the Exchange Online remote session, just as we did for Skype for Business Online. Please check the screenshot below.

        Import-PSSession $exchangeSession –DisableNameChecking

38

30. Once you’re done running the above command you would get the results as shown in the image above.

31. After you get the desired results in the screen, try running the below mentioned command , you should see information about your Office 365 domains that are configured for email addresses in Exchange Online.

Get-AcceptedDomain

39

32. This confirms that you have successfully connected to Exchange Online, you can also verify that by running the “Get-Mailbox” command as shown in the email below. This should return the Mailbox information of the users who are in Office 365.

40

33. So till now we have seen how to manage the user administration/license management for Office 365 , SharePoint Online , Exchange Online & Skype for Business Online using Windows PowerShell .Now let’s see how to manage the Security and Compliance center in Office 365 using Windows PowerShell .

34. The connection instructions for the Security & Compliance Center are very similar to those for Exchange Online, but with a slight difference .Let’s take a look at it. To get started with, please run the below mentioned command which creates a remote PowerShell session with the Security & Compliance Center

$ccSession = New-PSSession -ConfigurationName Microsoft.Exchange -ConnectionUri https://ps.compliance.protection.outlook.com/powershell-liveid/ -Credential $credential -Authentication Basic –AllowRedirection

35. This will start loading the modules as shown in the image below.

20.PNG

36. Now in order to import the cmdlets for “Security and Compliance center” run the below mentioned command .This should look similar to the Exchange Online cmdlet. The DisableNameCheckingswitch isn’t required here as there are no unapproved verbs in the Security & Compliance Center. But the additional -Prefix ccparameter and value is something different here. The Exchange Online and the Security & Compliance Center share some cmdlets that have exactly the same names and provide the same functionality. Get-RoleGroup is an example.                                                                                             Import-PSSession $ccSession -Prefix cc

21.PNG

37. Now you can verify the result of the above command in the screenshot above.

38. In order to verify whether you have been successfully connected to “Security and Compliance center” in Office 365, please visit the below mentioned link and try executing the cmdlets there and see the results.

https://technet.microsoft.com/en-us/library/mt587093(v=exchg.160).aspx

39. So finally we have connected to all the instances of Office 365 (Office 365 user/license management, SharePoint Online, Exchange Online, Skype for Business Online & Security and Compliance center in Office 365) using Windows PowerShell and we also saw how to execute the appropriate cmdlets to manage them.

40. Now, run the below mentioned command to get the active sessions that are running .For that run the Get-PSSession

The Get-PSSession cmdlet should show you that you have at least three remote sessions open, one for Skype for Business Online, one for Exchange Online and one for the Security & Compliance Center (it’s possible you could have more than three remote sessions running, depending on whether you’ve used this instance of Windows PowerShell to connect to something else besides the Office 365 services). You should see something similar to the following.

41.png

41. Since we have verified the active sessions that are running, now run the below command one at a time to close the session. If you just close the Windows PowerShell window, your Skype for Business Online remote connection will remain active for the next 15 minutes or so. Because Skype for Business Online limits the number of simultaneous connections that any one person or any one domain can have open, that could be a problem. With Skype for Business Online, an individual administrator can have, at most, three open connections at one time, and a domain can have a maximum of nine open connections. If you sign in to Skype for Business Online and then exit without properly closing the session, that session remains open for the next 15 minutes or so. As a result, that’s one fewer connection available to you or to other administrators in your domain. So run the below mentioned command to close the remote sessions for Skype for Business Online, Exchange Online, and the Security & Compliance Center gracefully.


Remove-PSSession $sfboSession

                                Remove-PSSession $exchangeSession

                                Remove-PSSession $ccSession

 42. If you prefer to close all the sessions at the same time without doing it one at a time, please run the below mentioned command.


Get-PSSession | Remove-PSSession

 43. The above mentioned commands will stop the PowerShell sessions for Skype for Business Online, Exchange Online, and the Security & Compliance Center gracefully but not SharePoint Online and hence to stop the session for SharePoint Online , run the below mentioned command .

Disconnect-SPOService

43.png

44. Now inorder to verify whether we have successfully disconnected from SharePoint Online service run the below mentioned command and it should throw you an error.

44.png

45. This confirms that you have successfully disconnected from SharePoint Online management shell.

So finally we have seen how to configure Windows PowerShell to support SharePoint Online Management shell, Exchange Online Management Shell, Skype for Business Online Management Shell and Office 365 Compliance center.


Office 365: Setting up your Windows PC to support SharePoint Online management shell

8

  1. Install Windows Management Framework 3.0 in your computer by downloading it from the below mentioned link.

https://www.microsoft.com/en-us/download/details.aspx?id=34595

  1. Click on the download button on the link above and you will get a list of files to download as shown in the image below. Choose the one that best suits your operating system. In my case I installed KB2506143

                               For 32-bit operating system choose: x86

                              For 64-bit operating system choose: x64

1

3. Once you’re done downloading the appropriate file go ahead and install it in your computer. You will be prompted for a system restart to complete the installation.

4. The next step would be to install the “SharePoint Online Management Shell “module, please download that from the below mentioned link.

https://www.microsoft.com/en-us/download/details.aspx?id=35588

5. Click on the download button on the link above and you will get two files to download as shown in the image below. Choose the one that best suits your operating system.

                For 32-bit operating system choose: x86

                For 64-bit operating system choose: x64

2
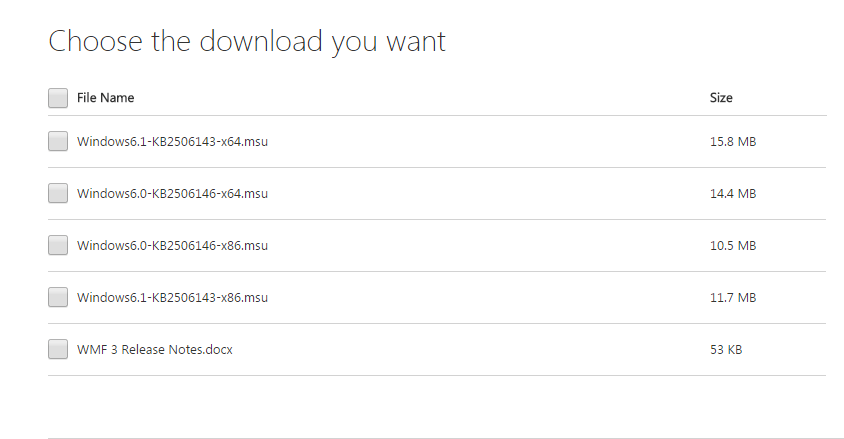
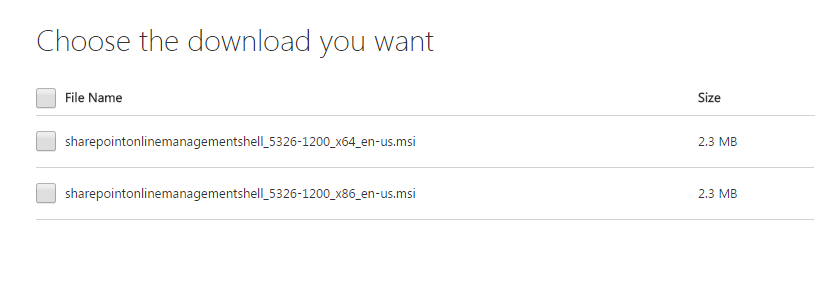
6. Once you’re done downloading the appropriate file go ahead and install it in your computer. You won’t be prompted for a system restart this time.

7. After that’s done, Click Start–>All Programs–>Check for SharePoint Online Management Shell.

3

8. Open “SharePoint Online Management Shell”, and type the below mentioned command to connect to your SharePoint Online subscription and hit enter.

Connect-SPOService -Url https://vigx-admin.sharepoint.com -credential     vigganesan89@vigx.onmicrosoft.com

Note: Please note that the account which you’re using here should have SharePoint Online administration access. Else you won’t get the desired result

9. Where URL is the URL of your “SharePoint Online admin center “and the credential is your Office 365 account name and password.

Note: Please check the SharePoint Online admin center screenshot below, you can find the admin center url in the address field

4

10. Once you hit enter you will get a dialog box as shown below prompting for your Office 365 user name and password. Please go ahead and enter that and click on ok and be patient.

5.png

11. If the command succeeded it won’t return anything, else it will yell at you with bunch of errors (that’s the funny part about PowerShell!!!) .Here in my case, the command succeeded and hence it didn’t return anything.

6

12. Now in order to confirm whether you have successfully logged into SharePoint Online management shell, please go ahead and run the “Get-SPOSite” command and see if it returns the list of all SharePoint Online sites as shown in the image below.

7

Finally we are done with the task of setting up a SharePoint Online Management Shell environment.

Thanks for reading. Happy SharePointing!!!


Office 365 Usage reporting:

Office-365-Cloud-Logo.pngUnderstanding how people in your organization are using Office 365 is an important step in driving more usage and ultimately getting the utmost value from your investment in Office 365. In regards to this Microsoft has recently introduced the new reporting dashboard feature in Office 365 admin center which gives the usage reports for SharePoint, One Drive for Business, Skype for Business and Yammer, which give IT greater visibility into usage across these services in Office 365.

Now let’s take a look at what you can find in these usage reports,

  • Activity dashboard (also called reporting dashboard)—Provides you with a high-level overview of how many people in your organization are using Office 365. Each service in the suite, such as Skype for Business and Exchange, has its own tile that surfaces key activity data, making it easy for you to get a quick understanding of the activity within that service. To view detailed information by service or by individual user, simply click the specific tile or use the drop-down menu at the top of the reporting dashboard.

  • Email activity report—Enables you to understand email usage, such as send, receive and read activity. It also enables you to monitor trends in email traffic, and can be especially helpful in scenarios such as user migration.

  • Office activations report—Shows which users who have been assigned an Office 365 license have signed into Office 365 on at least one device, including a breakdown by device type. This report helps you identify users who have been assigned a license but have not yet activated it, so you can provide assistance as necessary.

  • SharePoint site usage report—Provides you with storage consumption details across all your SharePoint sites. The report helps you see activity across sites, how much storage is available per site and how the sites are being used for file storage.

  • One Drive for Business usage report—This report helps you understand storage and sharing activity across One Drive for Business, including number and size of files stored, in aggregate and per user.

  • Skype for Business report—Shows Skype for Business usage, with details such as minutes spent in a Skype Meeting and with breakouts on peer-to-peer activity such as IMs and calls, meetings organized and meeting participation.

  • Yammer report—Provides details on Yammer engagement—breaking out Like, Read and Post activities.

o3651

 Details you can act on:

All reports provide you with both aggregate and user-level information, so you can effectively plan training and communication that helps your users to take full advantage of the potential of Office 365.

All reports also provide information for different time frames: 7 days, 30 days, 90 days and 180 days. You can export all reports into CSV format and open them with a tool like Excel to quickly filter or pivot the data for further analysis.

o3652.png

 While the reports do provide the ability to track usage at the individual user level, IT admins will only have access to information they already have permission to access in the service. Microsoft will also be rolling out a new privacy feature that allows you to anonymize user-level information before sharing it with other stakeholders in the company.

Global admins can turn on privacy settings by going to : Settings > Services & add-ins > Report.

o3653.png

 You can find detailed log information that allows you to audit and track specific user and admin activities in the Compliance Center.

Thanks for reading this post.


Demystifying SharePoint server licensing:


1.png

So this post is to explain how SharePoint server licensing works. To be honest I often used to stumble around trying to understand how this entire thing works and after doing a lot of research in the internet I was able to understand how the entire licensing part works and hence I wanted to write an article on that hoping that it would help you all to have a better understanding about SharePoint Server licensing.

With that being said, I’ll be discussing about SharePoint server licensing in 2013 and Office 365 and how things are expected to change in SharePoint server 2016 as well. So before we get started let me go ahead and define certain terminologies that I’ll be using often in this post so that you can have a better understanding about those terms when I’m using that in this post later.

Internal Users: Users who are the licensee’s or its affiliates’ employees and on-site agents and contractors (i.e. Users who are present in your domain and have an account in AD)

External Users: Users who are not the licensee’s or its affiliates’ employees or on-site agents or contractors (i.e. Users who are not present in your domain and don’t have an account in AD).

Intranet: Website hosting content, information, or software that is accessible inside the firewall to internal users only (i.e. Within the company’s firewall).

Extranet: Website hosting content, information, or software that is accessible inside the firewall to internal users and named external users only.

Internet: Website hosting content, information, or software that is publicly accessible to all users (internal and external). (i.e. Outside the company’s firewall)

CAL:   Client Access License.

2.png

Microsoft licenses SharePoint server 2013 using the Server/Client Access License licensing model.  The Server/CAL licensing model requires both the server license on which it’s (i.e. SharePoint application) installed as well as the CALs for the users (or devices) that access the application. To be more clear you need license for each server on which SharePoint is installed and apart from that you also need licenses for the users (or devices) that access SharePoint. However, please note that the CAL requirements may vary based on user status and CALs are generally required for internal users to access all SharePoint server software. The only exception to this is, internal user access to Internet websites (public-facing websites such as e-commerce SharePoint sites) .In these cases, the SharePoint CAL requirement is waived. On the other hand, this is not the case for external users, you don’t need to purchase any extra license for external users and the server license by itself will take care of their access. Please note that there can be couple of ways to leverage access to external users to access SharePoint such as (Anonymous authentication, Forms-based authentication etc. …However, an external user who still has a user account in your AD won’t be considered as external as per SharePoint sever licensing model if he’s using his AD account to access SharePoint). So it’s very important to choose external users access carefully or else you might end up paying licenses for them as well.

I would also like to touch base on the “devices” part which I mentioned earlier so that you have an understanding about how that would have an impact on SharePoint licenses. Let’s consider a scenario where you’re accessing your SharePoint site from your workstation and at the same time you’re logged into the SharePoint site from your smartphone as well, then that’s two devices accessing the same site. SharePoint doesn’t consider that as a single license, its takes it as two different devices accessing the same site. This is where the device licenses come into picture. So it’s very important that you choose the correct licensing model.

User CALs:

With the User CAL, you purchase a CAL for every user who accesses the server to use services such as file storage or printing, regardless of the number of devices they use for that access. Purchasing a User CAL might make more sense if your company’s employees need to have roaming access to the corporate network by using multiple devices, or from unknown devices, or if you simply have more devices than users in your organization.

3.png

Device CALs:

With a Device CAL, you purchase a CAL for every device that accesses your server, regardless of the number of users who use that device to access the server. Device CALs may make more economic and administrative sense if your company has workers who share devices, for example, on different work shifts.

4.png

The following diagram depicted below illustrates whether a user needs a SharePoint CAL or not. “Restricted” refers to content stored inside the firewall for internal access and possibly limited, identified external user access. “Public/Internet” refers to content stored outside the firewall for broad, unrestricted access.

5.png

Now, let’s take a look at certain scenarios which can give us a better explanation on how the licensing part works for internal and external users.

Scenario A: Intranet

Description: Internal users accessing content, information, or applications inside the firewall through a local area network (LAN) or the Internet. No other users have access.

Example: A professional sports team sets up an intranet site that the manager, coach, and players access. It is also used for support staff such as the physiotherapist who is an on-site contractor rather than an employee, and for CAL requirements, an internal user. A news reporter trying to access the SharePoint Server site is denied access.

Licensing:

Server: One SharePoint Server 2013 license per running instance of the software.

Internal Users:  One CAL/user.

6.png

As shown in the above image, the internal users (the team’s managers, coach, players, and on-site therapist) each must be assigned a CAL. This requirement does not change if the same users are accessing the intranet site remotely from the team’s offices. Given that this is an intranet site, no external user access is permitted.

Scenario B: Extranet

Description: An organization extends access to otherwise restricted content inside the firewall to a limited number of identifiable external users.

Example: The Elm University publishes research papers that are available to specific educators from other universities (external users). This situation is an intranet plus extranet scenario.

Licensing:

Server: One SharePoint Server 2013 license per running instance of the software.

Internal Users: One CAL/user.

External Users: SharePoint CALS are not required; the server license permits external user access.

7.png

As shown in the above image, the internal users (the school’s faculty and staff) each must be assigned a SharePoint CAL. This requirement does not change if the same users access the site remotely while they are off-campus. The identifiable external users (educators from other universities) who are permitted to access otherwise restricted content inside the firewall do not require SharePoint CALs, because external user access is permitted under the server license. No other users are permitted to access the site.

Scenario C: Internet

Description: Internal users make content, information, and applications publicly available to users via the Internet (for example, on a public-facing company website). A mix of internal and external users anonymously accesses the site, including employees. No SharePoint CALs are required. External user access is permitted under the server license, and SharePoint CAL requirements for internal users are waived for access to content, information, and applications made publicly available via the Internet.

Licensing:

Server: One SharePoint Server 2013 license per running instance of the software.

Internal Users: CALs are not required.

External Users: CALs are not required.

8.png

As shown in the above image, access is unrestricted. The only license required is the server license. SharePoint CALs are not required to access content, information, and applications made publicly available to users via the Internet (that is, not restricted to intranet or extranet scenarios). The same licensing applies for an e-commerce site where access is not strictly anonymous. Again, SharePoint CALs are not required to access content, information, and applications made publicly available to users via the Internet.

Licensing has been simplified in SharePoint 2013. SharePoint Server 2013 collapses internal and external use under a single licensing offering/model.

In addition to the points that we discussed above, there are certain classifications in the CAL that we need to be aware of as this will be very helpful in choosing the right version of SharePoint with the right features for your company. The CAL can be classified into two types 1.  Standard CAL and 2. Enterprise CAL. Check the table below to know the difference between Standard and Enterprise CAL.

Standard CAL You get features such as sites, communities, content and search in Standard CAL.


Enterprise CAL You get features such as such as Access Services, InfoPath Services, Power View, PerformancePoint Services, Excel Services, Reporting services and Visio Services.


SharePoint Standard CAL:

The Standard CAL delivers the core capabilities of SharePoint

Sites: a single infrastructure for all your business websites

Communities: an integrated collaboration platform

Content: enterprise content management (ECM) for the masses

Search: people and expertise search, visual previews, visual best bets


SharePoint Enterprise CAL:

The Enterprise CAL delivers the full capabilities of SharePoint

Sites: a single infrastructure for all your business websites

Communities: an integrated collaboration platform

Content: ECM for the masses

Search: standard search features plus entity extraction, video search, item recommendations

Business solutions (includes Access Services and InfoPath Services)

Business Intelligence for everyone (includes Power View, PerformancePoint Services, Excel Services, and Visio Services)

Check this link to have a detailed overview of all the features available in both the versions (i.e. Enterprise and Standard): _ http://www.fpweb.net/sharepoint-2013/compare-sharepoint-server-standard-enterprise/

Alright, I guess we have talked enough about SharePoint Server 2013 licensing, now let’s a look on how things are expected to change in SharePoint 2016.

SharePoint Server 2016 licensing:

9.png

For the most part the licensing is expected to remain the same in SharePoint server 2016 as well. You have the same server CAL license and user (or devices) licenses in SharePoint Server 2016 as well and this hasn’t changed. However, as you all are aware, SharePoint 2016 has a major change in terms of its architecture .We have a new concept called as “MinRoles” that was introduced in SharePoint Server 2016 .MinRole enables SharePoint Administrators to limit a SharePoint server to a specific role (i.e. front end, application server, distributed cache and custom). So using MinRole you can make a SharePoint server only do the specific role which it’s expected to do based on the role it has been assigned to .This will definitely lead to a downside in terms of licensing as using MinRole the server will only do a specified task .Let me explain this with an example ( If you have your current SharePoint 2013  application server in your production farm running search , user profile and MMS etc. ….you won’t be able to run all these services in a single app server once you migrate to SharePoint server 2016 .You have to assign a specific server only for SharePoint search ) .So obviously this will lead to  purchasing extra licenses if you need to utilize more services .

sql2016.jpg     windows_server_2016_gradient.jpg

Also in terms of the necessary software prerequisites, SharePoint Server 2016 requires Window server 21012 R2 or Windows Server 2016 as the underlying operating system and also coming to the backend SQL server you need 64-bit edition of SQL Server 2014 SP1 or SQL Server 2016. Another important point to note is, SharePoint 2016 doesn’t have any foundation version. You get only standard and enterprise version. Please note that there are few changes that has implemented in SQL Server 2016, you have a new component called PolyBase that has been introduced in SQL Server 2016. This mainly takes care of combining both relational data and non-relational data within SQL Server itself. You can also run queries on external data in Hadoop or Azure blob storage using this. The key factor to note here is that, “PolyBase “can run only on a single instance in a SQL Server. If you have multiple instances of SQL running on the same server then you may not able to run “PolyBase” on all the instances. So please the “PolyBase” configuration accordingly.

SharePoint Online and Hybrid:

HYBRID.gif

Let’s see how licensing works on SharePoint Online and Hybrid, it’s a known fact that SharePoint Online has become a buzzword over a period of time and we can see a lot of organizations moving their on-premises SharePoint workload to cloud. However, I’ve noticed a lot of SharePoint professionals as well as project managers having a confusion on how licensing works for SharePoint Online and what has to be done for a successful SharePoint Hybrid implementation.

So just to clear the confusions about this, SharePoint on-prem as already discussed is server/CAL license based whereas SharePoint Online is subscription based. As you all know, most of the cloud services today are subscription based and their licensing is totally different from on-prem platforms. Azure and Office 365 are good examples for cloud based platforms that works based on subscriptions. However, there is a minor difference in terms of subscription between these two products (i.e. Office 365 & Azure) and I’ll be discussing about that in a different post.

With Office 365 (SharePoint Online) you get two types of plans, i.e. Plan 1 and Plan 2. Please check this link below to have a proper understanding of the features involved in both these plans.

https://products.office.com/en-us/SharePoint/compare-sharepoint-plans?legRedir=true&CorrelationId=d1645733-7515-401f-904a-f75983522c29

It’s up to you and your business to choose the appropriate plan that best suits your business need.


Now, before discussing SharePoint hybrid licensing, let’s take a look at the traditional on-premises scenario. Historically, SharePoint on-premises customers were required to purchase a server license for each SharePoint server, with a client access license (CAL) required for each user or device that will be accessing those servers. There was also an optional Enterprise CAL, sold on a per-user base for accessing additional features (Ex: SSRS).

When cloud services are added to the mix, this relatively straightforward scenario becomes more complicated. As a subscription-based service, SharePoint Online is bought through a monthly per-user fee, instead of licensing.

Roughly around 2 years ago, Microsoft attempted to simplify licensing for hybrid SharePoint deployments by allowing Office 365 user licenses to be used as CALs for accessing SharePoint resources that reside on-premises. In other words, organizations that had both local and cloud-based SharePoint resources would have to purchase server licenses for each on-premises SharePoint server, but would not be responsible for purchasing CALs, as long as every user accessing the on-premises SharePoint resources had SharePoint Online as part of their Office 365 subscription.

But things have changed a bit now, if an organization runs SharePoint in its data center and decides to extend its deployment to the Office 365 cloud, verifying that the local environment is properly licensed is the first thing to do. As previously mentioned, each SharePoint server requires a server license. Unlike CALs, there is no “enterprise” upsell for the servers. Organizations must simply purchase a SharePoint server license, and any required dependency licenses, such as for Windows Server and SQL Server.

The organization will also have to purchase CALs for each person or device that will access SharePoint. Microsoft offers Standard CALs and Enterprise CALs. The Standard CAL provides access to SharePoint’s core capabilities, such as sites, communities, content management and search.

Organizations that need SharePoint capabilities beyond those covered by the Standard CAL should purchase an Enterprise CAL — in addition to the Standard CAL — for each user or device that will access those resources. The Enterprise CAL provides access to features such as Power View or Excel Services.

With the Hybrid scenarios in place now, choosing the correct license/subscription might be bit confusing. To make this simple, please take a closer look at SharePoint Online Plan 1 and Plan 2 once again. Plan 1 for SharePoint Online is more or less matched to the features that are delivered through a Standard CAL, while SharePoint Online Plan 2 is closely matched to the SharePoint Enterprise CAL. There are some minor differences between the Standard CAL and SharePoint Online Plan 1, just as there are some minor differences between SharePoint Online Plan 2 and the Enterprise CAL, but mostly these hosting plans are closely matched to their on-premises counterparts.

To be more precise, let’s consider a scenario where you want to implement Hybrid search in your environment and you’re confused to choose the appropriate plan. In such case, take a look at the type of search that has been implemented in your on-premises SharePoint Farm. Is it normal search or Enterprise search? For the most part I bet it would be Enterprise search, then in such case you need to assign Plan 2 license in SharePoint Online for all the end users as only then they would be able to see the search results from SharePoint on-premises or vice versa. To know more about Hybrid search, please click this link to take a look on my blog post about Hybrid search.

SimplifiedSharePointhybriddiagram_th[4].png

Last but not least, let’s take a look at licensing for SharePoint foundation. With SharePoint foundation, you don’t need to purchase any SharePoint license for SharePoint Foundation as it’s a free version. The only license you would need is the Windows server license on which SharePoint Foundation would be installed. You would also not require separate license for SQL Server as SharePoint foundation installs SQL Server express by itself while running the set up file.

Note: As already mentioned above, SharePoint 2016 doesn’t have any foundation version. You either get the Standard version or the Enterprise version.

Finally, to conclude, as SharePoint professionals it’s very important that you have a proper understanding of how licensing works in SharePoint on-premises and SharePoint Online as choosing the correct version/license is vital for any successful SharePoint implementation. If your organization uses SharePoint just to dump the documents and the usage is also very minimal where no enterprise features would be used, then choose the standard version. On the other hand, if you’re organization uses SharePoint for collaborating with customers /other stakeholders and also the dependency of enterprise features is more then choose the enterprise version. As far SharePoint Online/Hybrid is concerned choose the appropriate plan for the end users that best suits the business need. When it comes to migration where you would be migrating from on-premises version to the other one (preferably from 2013 to 2016) please make sure that considering the licenses for other supporting software’s also (i.e. SQL Server & Windows server).

Thanks for reading this post. Happy SharePointing!!!!


SharePoint Online limits across different Office 365 plans:

SharePointOnline2L-1

Found this good article on Tech Target Network about SharePoint Online limitations and wanted to share it with you guys ….

Depending on the Office 365 plan your business uses, there are several SharePoint Online limits to keep in mind when planning a SharePoint migration.

As with most software as a service deployments, Microsoft imposes limits on the SharePoint Online service across its various Office 365 plans. Organizations with the appropriate service plan can typically work within those limitations, but it’s important for IT planners to recognize restrictions in advance and ensure that any migration from a local SharePoint deployment to SharePoint Online will remain within the established limits. Otherwise, the online migration may experience problems or incur unexpected premium costs for additional resources.

SharePoint Online limits typically involve storage and maximums in the number of items, users, subsites and file sizes. Consider SharePoint Online in Office 365 Business Premium, which offers base storage of 10 GB per tenant plus up to 500 MB per subscribed user; additional storage can be purchased for a fee. For example, a business with 5,000 users would see a storage limit of about 2.5 TB. This might sound like a lot, but storage-intensive file collections across many users can easily consume a significant portion of that capacity. Other factors like Recycle Bin storage can also count against storage limits.

The Office 365 Business Premium plan imposes other limits such as up to 1 TB per site collection or group document library, synchronizing up to 5,000 items — such as folders and files — in site libraries, synchronizing up to 20,000 items in the OneDrive for Business library, and handling up to 500,000 site collections where each site collection can support up to 2,000 subsites. Users can upload files as large as 2 GB per file, but can only attach files up to 250 MB.

There are also SharePoint Online limits on site elements such as lists and libraries, pages and security. For example, a single wiki or webpage can only contain up to 25 Web parts, and a single user can belong to up to 5,000 security groups. Such limits may require changes to existing local SharePoint resources before migration.

The limits for other plans such as SharePoint Online in Office 365 Enterprise, Education and Government may differ from the Business Essentials or Business Premium plans. It’s always important to check the needs of your SharePoint deployment against the preferred plan to ensure that you’re getting the most appropriate and cost-effective service. It’s also worth checking the site elements to see which, if any, sites or wikis may require changes.

Signing up for Office 365 trial plan:

This is going to be a simple article where I’ll be explaining  how to sign up for a free Office 365 trial plan and make use of its services. As you must be aware, Office 365 gives you a one month free trial version where you can sign in for Office 365 and play around with the services and gain some knowledge on what Office 365 is all about, what are the services it offers and  how to manage users/services etc.…

I’m going to make this post pretty  basic by just discussing the steps involved in signing up for an Office 365 trial version and utilizing the services offered by it. So if you’re someone who is new to Office 365 and would like to understand how to get started with using Office 365 services, then this article would be a good primer article for you guys …..

Alright let’s jump in …

  1. Please go to https://products.office.com as shown in the screenshot below.

1

2. Choose “For business” option, it will take you to a screen as show below. You can also choose “For home” if you would like to explore the features in that plan. I’m going with the business option here as it gives you more features when compared with the home plan.

2

3. Once you’re done clicking “For business” option, it’s going to take you to a screen as shown below. You can notice all the available Office 365 business plans here …If you scroll down it would give you a detailed explanation about what’s included in each plan and the licensing cost. So carefully take a look at the plans before choosing it.

3

4. I’m choosing the “Office 365 Enterprise E5 “free trial plan as you can see in the screenshot below. You need to click on the “Free trial “button if you want to subscribe for a trail version. Also please notice that the free trail plan is valid only for one month.

4.PNG

5. You would be taken to a form as shown in the screenshot below asking for your details. Please fill in the appropriate information and click next. Also please bear in mind that you won’t be able to change your country after you have successfully signed up for Office 365.

5

6. The next screen would be asking your username, password & Company name .Please key in those values and click next

Note: The Company name which you key in here will become a part of your Office 365 tenant url , SharePoint Online sites url , Skype for Business meeting url &  Email addresses of those users who are synced with Office 365.  Also while entering the Company name, please make sure that you’re entering an imaginary name or the name of a domain that you own and not a real company name .It’s strictly not recommended to enter your company name without consulting your IT team .

7

7. Once you’re done entering the values, click next and it’s going to ask you to enter your mobile number just to make sure that you’re not a robot. So enter your mobile number and then key in the verification code which is sent to you as a text.

8

9

8. Once you’re done entering all these details you’re all set now and you will see the below mentioned screen which says that its saving all your details …

10
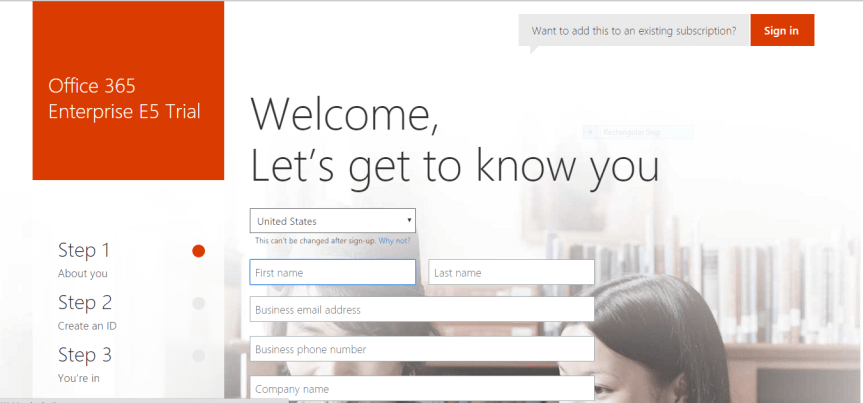
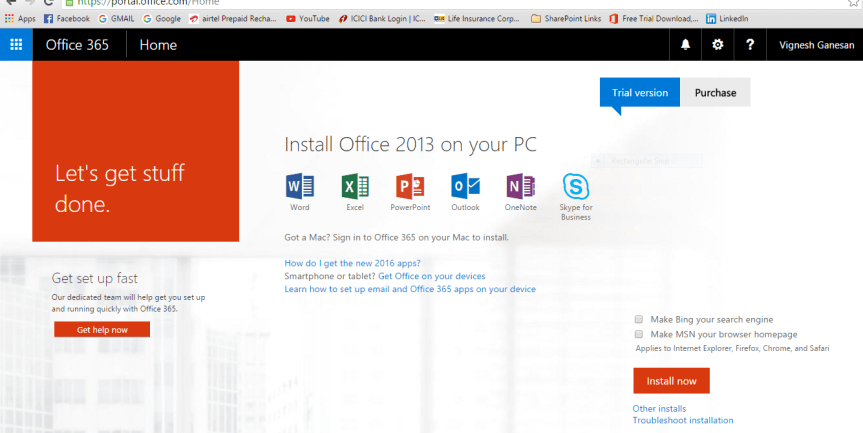
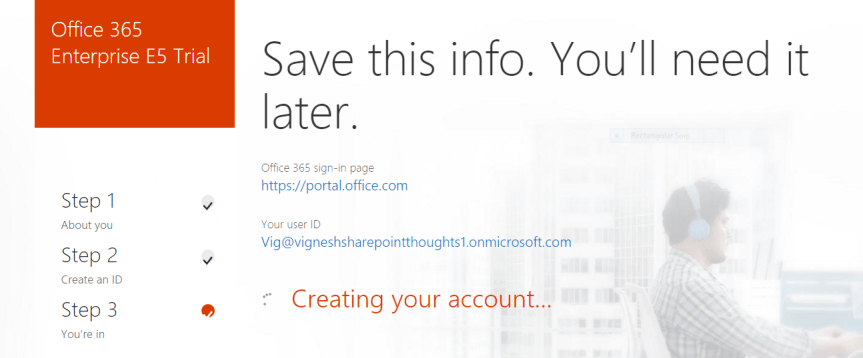
9. Please remain patient for few mins until your Office 365 tenant is completely set up, you will get a screen like this as shown in the screenshot below.

11

10 .However , please note that by this time your Office 365 tenant is not yet completely set up .The app launcher is still configuring things for you …so please remain patient for few more minutes . You can click the app launcher and check the status….

You can see the note which says, “Setting up “.

12

11. So finally after few minutes, you can notice the apps getting displayed in the app launcher indicating that your Office 365 tenant is set up successfully.

13

12. You can also take a look at the “service overview” page to check the health status of all the services.

14

13. Please click on the “Admin” option towards your left hand side to access all the services.

admin page

14. This is how the admin center for each service looks like ….

For Exchange

Exchnage admin centre

For SharePoint

SharePoint Admin centre


For Skype for Business

Sfb admin centre

15. You can use the “USERS” option towards your left hand side to manage users and their licenses in the Office 365 admin center.

Managing users.PNG

16. To make any changes to a user’s account such as resetting his/her password , edit the user’s details and to assign licenses etc. …please select the user first and then it will give you an option towards your right hand side to do that …(please see below )

User info.png

17. Azure Active Directory is only available for paid customers, so if you’re trying to access it on a trial version you’re likely gonna end up with the error as shown in the screenshot below.

Azure for AD

18. I’ve also created few more articles in my blog about Office 365 Identity management, Office 365 Troubleshooting tools, Useful Office 365 PowerShell commands & Required ports for Office 365 implementation…Please go through the below mentioned links to read them.

Office 365 Identity management

Office 365 Troubleshooting Tools

Useful Office 365 commands

Required ports for Office 365

Thanks for reading this post!!!


Yammer Enterprise to be activated by default on all Office 365 tenants

To all the Office 365 Admins out there , please watch out for this new announcement made by Microsoft for Yammer Enterprise ….

https://blogs.office.com/2016/02/02/get-ready-for-yammer/

yammer-logo-ps3


Things to know about SharePoint Hybrid Search

Things to know about SharePoint Hybrid Search:

This post is mainly intended for those who want to understand about those services that can go Hybrid on SharePoint Server 2013 and I’ll be mainly discussing specifically about “SharePoint Server Hybrid search” here ….

The below mentioned SharePoint services can go hybrid:

  1. One drive for business
  2. SharePoint Search
  3. Business Connectivity service
  4. Duet for enterprises

 TechNet link for Hybrid SharePoint Services: _ https://technet.microsoft.com/en-us/library/dn197168.aspx

Now as mentioned before I’ll be discussing about “SharePoint Hybrid search” alone in this post and will be discussing about other SharePoint services that can go hybrid in a different post.

I’m going to keep this post simple by discussing only about what “SharePoint Hybrid search” is all about and the different topologies it has. The configuration part will be discussed on an upcoming new post.

What is SharePoint Hybrid Search?

To put it in simple words the term “Hybrid “here refers to using both on-premises + office 365 (SharePoint online) in your SharePoint deployment .If you have an environment where both your SharePoint server and office 365 (i.e. SharePoint Online) is integrated then it’s likely to be called as a “Hybrid SharePoint environment “.

Different topologies available in SharePoint Hybrid search:

There are three different topologies to speak about that are available for configuring SharePoint Hybrid search and it’s up to you as a SharePoint administrator to choose the right topology that suits the business requirement .

The 3 different topologies are …..

  1. One-way outbound search
  2. One-way inbound search
  3. Two way (bidirectional) –> (I’m not sure if this is supported by Microsoft as of now .However I’ve discussed about this method also )

One-way outbound search:

   In this model the user executes a search query in the SharePoint on-premises search center site and the query component looks for the results from the SharePoint on-premises site as well as from Office 365 and displays it for the user in the search results .

out

Note: The users should SharePoint online license assigned to them to be able to get the search results from SharePoint Online.

One-way inbound search:

     In this model the user executes a search query in the SharePoint online search site and the query component looks for the results from the SharePoint online sites as well as from SharePoint on-premises site and displays it for the user in the search results.

inbound

Note: The users should SharePoint online license assigned to them to be able to get the search results from SharePoint Online.

Two-way (bidirectional) topology:

    The name speaks for itself. In this model the user will be able to execute a search query in the SharePoint on-premises search site and get results from SharePoint server as well as from Office 365 (i.e. SharePoint online). Similarly, a user who executes a search query in SharePoint online will be able to get search results from SharePoint online as well as from SharePoint Server.

bi

Note: The users should SharePoint online license assigned to them to be able to get the search results from SharePoint Online.

End user experience in the search center:

The below illustration shows how a user will see the results in the search center when his SharePoint environment is configured for Hybrid search ….

ue

Search model for a Hybrid-search environment:

qf

Also, if you haven’t gone through the video in the link below, I highly recommend you to take a look at this to understand about SharePoint server Hybrid search and how it works :

https://channel9.msdn.com/Events/SharePoint-Conference/2014/SPC320


Office 365 Identity Management

I often used to stumble around in understanding the Office 365 Identity Management process and hence I spent some time today trying to do some research on this topic and gained some knowledge about the Identity management process followed in Office 365.

Now this post is for those who are new to Office 365 and would like to understand how the identity management process works and what are the three main models involved in it.

There are basically three main models that can be used for Office 365 Identity management and it’s up to you and your business to analyze and choose the one which suits your need.

Office 365 Identity management models:

  1. Cloud Identity
  2. Synchronized Identity
  3. Federated identity

IM 1

Now, let’s take a look at these models …..

Cloud Identity:

In this model users are created and managed in Windows Azure Active Directory (WAAD) i.e. In the Office 365 Admin center on the “Users” tab.  There is no connection to any other directory.  This is the simplest model as there is no integration to any other directory.  Each user has an account created in the cloud which does not synchronize anywhere else. Also the password created for this account will be verified by Azure Active Directory and the password policies applied for these accounts is strictly limited only to the Azure Active Directory. However, note that you will still typically need additional on-premises credentials to gain access to a local workstation and local resources. These accounts can’t help you to login to a PC or access a printer that has been joined to the domain.

IM2

Synchronized Identity:

In this model users are created and managed in the on-premises directory and then get synchronized to Office 365 so they can access Office 365 resources. Typically this means running the DirSync appliance or in some cases FIM with the Windows Azure Active Directory Connector.  The newer builds of DirSync allow for the user’s password hash to be synchronized up to Office 365. However, please note this does not say clear text password. So using this model users can logon to Office 365 using the same credentials as on-premises with no additional infrastructure. The user enters the same on-premises password as they do in the cloud and during the sign-in this password will be verified by Azure Active Directory.

Note: This is a one way sync from on-premises AD to Azure active directory and hence any change made to a user’s synced account in Office 365 won’t be valid.

Sign-in procedure:  The web browser is redirected to the Office 365 sign-in service, where you type the user name and password for your work account. The sign-in service authenticates your credentials and generates a service token, which the web browser posts to the requested service and logs you in.

IM 3

Federated Identity:

This model is similar to the synchronized identity but with one change to that model: the user password is verified by the on-premises identity provider. This means that the password hash does not need to be synchronized to Azure Active Directory. This model uses Active Directory Federation Services (AD FS) or a third- party identity provider. This is often referred to as single sign-on.

Sign-in procedure: Federation relies on directory synchronization so that WAAD is populated. When the authentication request is presented to Office 365, the service will then contact the on-premises ADFS infrastructure so that AD is responsible for authenticating the request.

IM 4

In addition to these there are many third party identity providers that can be used to implement single sign-on, please take a look at this TechNet link to know more about them: _ https://msdn.microsoft.com/en-us/library/azure/jj679342.aspx

Office 365 On-boarding/Troubleshooting Tools and Resources

Office 365 On-boarding/Troubleshooting  Tools and Resources:

While we indeed have a lot of tools out there for troubleshooting Office 365 and which can also be used for a successful Office 365 deployment the below mentioned one’s are the widely used tools to troubleshoot/deploy Office 365 .

Office OnRamp–>  OnRamp for Office 365 is an automated assistance tool that helps you gather configuration requirements and perform deployment readiness checks against your on-premises environment.  OnRamp can accelerate the deployment timeline, especially for organizations with requirements such as identity federation or hybrid deployment . OnRamp can be accessed via https://onramp.office365.com/ or  you can access it from within your Office 365 tenant by navigating to the Tools section .

Fast Track–>  As part of the FastTrack program, you’ll receive personalized assistance from a Microsoft onboarding expert who will ensure that your Office 365 service is provisioned and ready to use. All Office 365 enterprise customers are eligible for FastTrack with the purchase of 150 or more eligible seats.

HRC Checks (Health, Readiness and Connectivity Checks) :_   This is a  recommended practice by Microsoft where  you’re supposed to run  health, readiness, and connectivity checks before you set up Office 365.

Here’s why:

  • Checks can find settings in your current environment that might cause problems when you start to set up or use your services.
  • If you know where the potential roadblocks are before you start, you can fix or work around them to make your deployment path easier to complete.

This is just a read only check and this won’t make any changes to the environment , hence the users won’t be affected .

Microsoft Remote Connectivity Analyzer : _ The Office 365 Support and Recovery Assistant helps users troubleshoot and fix their account or profile related Outlook issues. The assistant performs a series of diagnostics tests to identify the root cause of issues, such as verifying users’ credentials, licenses, updates to Outlook clients, and whether Outlook servers are reachable. Depending on the test results, it can offer to automatically fix problems for users or provide instruction on recommended solutions. All the diagnostics results are saved in a log file for users to share with their Outlook admin or support engineers for further investigation. Each time you run Office 365 Support and Recovery Assistant, it automatically gets updated to its latest version, so it can troubleshoot any new Outlook problems.

Link for Remote Connectivity Analyzer :_ https://testconnectivity.microsoft.com/

IDFix: IdFix is used to perform discovery and remediation of identity objects and their attributes in an on-premises Active Directory environment in preparation for migration to Office 365. IdFix is mainly used by the Active Directory administrators who are responsible for DirSync with the Office 365 service.

Link for IdFix Tool :_ http://www.microsoft.com/en-us/download/details.aspx?id=36832

Lync Connectivity Analyzer :  This tool is used to determine whether the connections support Office 365 and On-premises Lync service .

Link for Lync Connectivity Analyzer: _ http://www.microsoft.com/en-in/download/details.aspx?id=36536

MOSDAL (Microsoft Online Services Diagnostics and Logging Support Toolkit) :_  The Microsoft Online Services Diagnostics and Logging (MOSDAL) Support Toolkit is used to perform  network diagnostics and collects system configuration, network configuration, and logging information for applications that are used to  Microsoft Office 365. The logs and diagnostic information that the tool generates provide data that helps technical support professionals troubleshoot configuration, network, installation, and other service-related issues.

The MOSDAL Support Toolkit collects log files, registry keys, and configuration settings that would otherwise require time-consuming and labor-intensive collection by using separate tools.

Link for MOSDAL Support Toolkit :_ https://support.office.com/en-us/article/Using-the-MOSDAL-Support-Toolkit-b6c079c4-5d54-465d-bbea-74732c48dc58

In addition to the above mentioned tools you can also use  other tools to support Office 365 , please check this link to get the list of all the tools :_ https://community.office365.com/en-us/w/diagnostic_tools/